Christmas just isn’t Christmas without a little something special from the kitchen, right? For me, holiday baking brings back so many sweet memories of my grandma’s kitchen, filled with laughter and the smell of warm spices. This year, I wanted to create something truly magical, a centerpiece that was as fun to make as it was to eat. That’s how these adorable Stacked Sugar Cookie Christmas Trees came to life!
Why You’ll Love These Stacked Sugar Cookie Christmas Trees
- They’re absolutely adorable and make a show-stopping centerpiece for your holiday table.
- The sugar cookies are soft and chewy, not hard and crunchy, which is just how I like them!
- The vanilla buttercream is rich, creamy, and holds its shape perfectly for stacking.
- It’s a really fun project to do with kids or friends, creating beautiful edible decorations together.
Ingredients You’ll Need
- All-purpose flour: This is your baking staple! Make sure it’s fresh for the best results. No special substitutions needed here.
- Baking soda & baking powder: These are our leavening agents, giving the cookies a lovely soft texture. Don’t skip them!
- Unsalted butter: Always use unsalted butter so you can control the salt content. Make sure it’s at room temperature for both the cookies and the frosting – this is key for a smooth mix!
- Granulated sugar & light brown sugar: The combination gives a perfect balance of sweetness and a little chewiness to the cookies.
- Vanilla extract: Use good quality vanilla! It really makes a difference in the flavor of both the cookies and the buttercream.
- Powdered sugar: Essential for that perfectly smooth, silky buttercream. Sifting it can help prevent lumps.
- Water or milk: Just a tiny bit helps achieve the perfect consistency for your buttercream. I usually use water, but milk works too.
- Green gel icing color: Gel colors are best for vibrant shades without thinning out your frosting.
- Red and white pearl sprinkles & yellow star sprinkles: These are for decorating your trees! Feel free to get creative with your favorite festive sprinkles.
How to Make Stacked Sugar Cookie Christmas Trees Step by Step
First things first, let’s get our oven ready. Preheat it to 350°F (180°C) and line your baking sheets with parchment paper. This will make sure your cookies don’t stick and cook evenly. While the oven warms up, grab a medium bowl and whisk together your flour, baking soda, baking powder, and salt. Set that aside for a moment.
Now for the wet ingredients! In a large mixer bowl, cream together your room temperature butter and both sugars until the mixture is light in color and really fluffy. This step is super important for a tender cookie, so take your time! Then, beat in the egg until it’s fully combined, followed by the vanilla extract. Once that’s all smooth, gradually add your dry ingredients to the wet mixture. Mix just until everything is combined and a thick, soft dough forms. Be careful not to overmix here, or your cookies might get tough! Use a rubber spatula to bring it all together into a cohesive ball if needed.
This is where the magic happens! We need three different sizes of cookie dough balls for our trees. Roll out an even number of 1-teaspoon, 2-teaspoon, and 3-teaspoon sized balls. Bake the large cookies for 7-8 minutes, the medium ones for 6-7 minutes, and the small ones for 5-6 minutes. Keep a close eye on them! Once they’re done, let them cool on the baking sheet for a couple of minutes before transferring them to a wire rack to cool completely. While they cool, you can whip up your vanilla buttercream. Beat the room temperature butter until it’s smooth, then add half of the powdered sugar and mix until smooth. Stir in the vanilla and water, then add the rest of the powdered sugar. Finally, mix in your green gel icing color until you have a beautiful Christmas tree green.
My Top Tips for Success
- I always make sure my butter is truly at room temperature for both the cookies and the frosting. This makes a huge difference in texture!
- In my experience, using a kitchen scale to measure flour is a game-changer for consistent results.
- Don’t be afraid to eyeball the green food coloring. Start with a little, then add more until you get the perfect shade you love.
- Trust me on this one: let the cookies cool completely before stacking and frosting. Warm cookies will just melt your beautiful buttercream!
- When piping the frosting, a medium star tip (like Wilton 21) gives a lovely, tree-like texture.
Common Mistakes to Avoid
- Overmixing the cookie dough: This can lead to tough, dense cookies. Mix just until combined.
- Not cooling cookies completely: If your cookies are warm, the frosting will melt and slide right off. Be patient!
- Under-baking or over-baking cookies: Keep an eye on the times provided for each size. Over-baked cookies are dry, under-baked ones will be too soft to stack.
- Using cold butter for frosting: Cold butter will result in lumpy, difficult-to-spread frosting. Always use room temperature butter.
How to Store Stacked Sugar Cookie Christmas Trees
- Room Temperature: Store in an airtight container for 3-4 days.
- Freezer (unfrosted cookies): Place cooled cookies in an airtight container or freezer bag for up to 3 months. Thaw at room temperature before frosting.
Frequently Asked Questions
Can I make the cookie dough ahead of time?
Yes, you can! Wrap the dough tightly in plastic wrap and refrigerate for up to 3 days. Let it come to room temperature for about 30 minutes before rolling into balls.
What if my frosting is too thick or too thin?
If it’s too thick, add a tiny bit more water or milk, a teaspoon at a time. If it’s too thin, gradually add more powdered sugar until it reaches the right consistency.
Can I use different sprinkles?
Absolutely! Feel free to get creative with any festive sprinkles you love. Mini M&Ms or edible glitter would also be fun.
Do I have to use a piping bag?
While a piping bag with a star tip gives the best “tree” effect, you could spread the frosting with a knife if you prefer. The look will be a bit different, but still delicious!
I hope these Stacked Sugar Cookie Christmas Trees bring a little extra sparkle and sweetness to your holiday season. They’re such a joy to make and share. If you give them a try, I’d absolutely love to hear how they turned out!
PrintStacked Sugar Cookie Christmas Trees
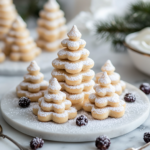
Adorable, soft sugar cookies stacked with creamy vanilla buttercream to create festive Christmas trees, perfect for holiday decorating.
- Prep Time: 45
- Cook Time: 8
- Total Time: 120
- Yield: 16-18 trees
- Category: Dessert, Holiday
- Method: Baking
- Cuisine: American
Ingredients
- 2 3/4 cups (358g) all-purpose flour
- 1 tsp baking soda
- 1/2 tsp baking powder
- 1/2 tsp salt
- 1 cup (224g) unsalted butter, room temperature
- 1 cup + 2 tbsp (233g) granulated sugar
- 2 tbsp (28g) light brown sugar
- 1 large egg
- 2 tsp vanilla extract
- 1 cup (224g) unsalted butter, room temperature
- 4 cups (460g) powdered sugar
- 1 tsp vanilla extract
- Pinch of salt
- 2-3 tbsp water or milk
- Green gel icing color
- 2-3 tbsp red and white pearl sprinkles
- 16-18 yellow star sprinkles
Instructions
- Preheat your oven to 350°F (180°C).
- Line baking sheets with parchment paper or silicone baking mats and set aside.
- In a medium bowl, combine the flour, baking soda, baking powder, and salt. Set aside.
- In a large mixer bowl, cream the room temperature butter and both sugars together on medium speed until the mixture is light in color and fluffy.
- Add the egg to the creamed mixture and mix until it is well combined.
- Add the vanilla extract and mix until it is well combined.
- Gradually add the dry ingredients to the wet ingredients and mix until the dough is well combined but do not overmix.
- Use a rubber spatula to help the dough come together into a more cohesive ball.
- Make three distinct sizes of cookie dough balls: 1 teaspoon, 2 teaspoons, and 3 teaspoons. Ensure you have an even number of each size.
- Bake the large cookies for 7-8 minutes.
- Bake the medium-sized cookies for 6-7 minutes.
- Bake the small cookies for 5-6 minutes.
- Remove cookies from the oven and allow them to cool on the baking sheets for 2-3 minutes.
- Transfer the partially cooled cookies to a wire rack to finish cooling completely.
- To make the frosting, beat the room temperature butter in a clean bowl until it is smooth.
- Add half of the powdered sugar to the butter and mix until smooth.
- Add the vanilla extract and 2 tablespoons of water or milk, then mix until smooth.
- Add the remaining powdered sugar and mix until smooth.
- Add green gel icing color to the frosting and mix until you achieve your desired shade of green.
- To assemble a tree, select one cookie of each of the three sizes.
- Fit a piping bag with a medium-sized star piping tip (like Wilton 21) and fill the bag with the green frosting.
- Pipe a swirl of frosting onto the largest cookie.
- Carefully place a medium-sized cookie on top of the frosting swirl.
- Pipe another swirl of frosting onto the medium cookie.
- Place the smallest cookie on top of the second frosting swirl.
- Pipe a final swirl of frosting on top of the smallest cookie.
- Decorate the top of the tree with a yellow star sprinkle.
- Add red and white pearl sprinkles around the frosting swirls as "ornaments".
- Repeat with the remaining cookies to create all your Stacked Sugar Cookie Christmas Trees.
Notes
Ensure butter is at room temperature for both cookies and frosting for best texture.
Do not overmix the cookie dough, as this can make cookies tough.
Allow cookies to cool completely before frosting to prevent melting.
Use gel food coloring for vibrant green without thinning the frosting.