Oh, quick and easy dinners! They’re my absolute favorite, especially on those busy weeknights when I just want something delicious without a lot of fuss. I remember one summer evening, the kids were running around outside, and I realized dinner needed to be on the table fast. That’s when this recipe for Quick Grilled BBQ Chicken really saved the day! It’s become a repeat offender in our house because it’s so flavorful, tender, and honestly, just a joy to make and eat. You’re going to love how simple and satisfying it is.
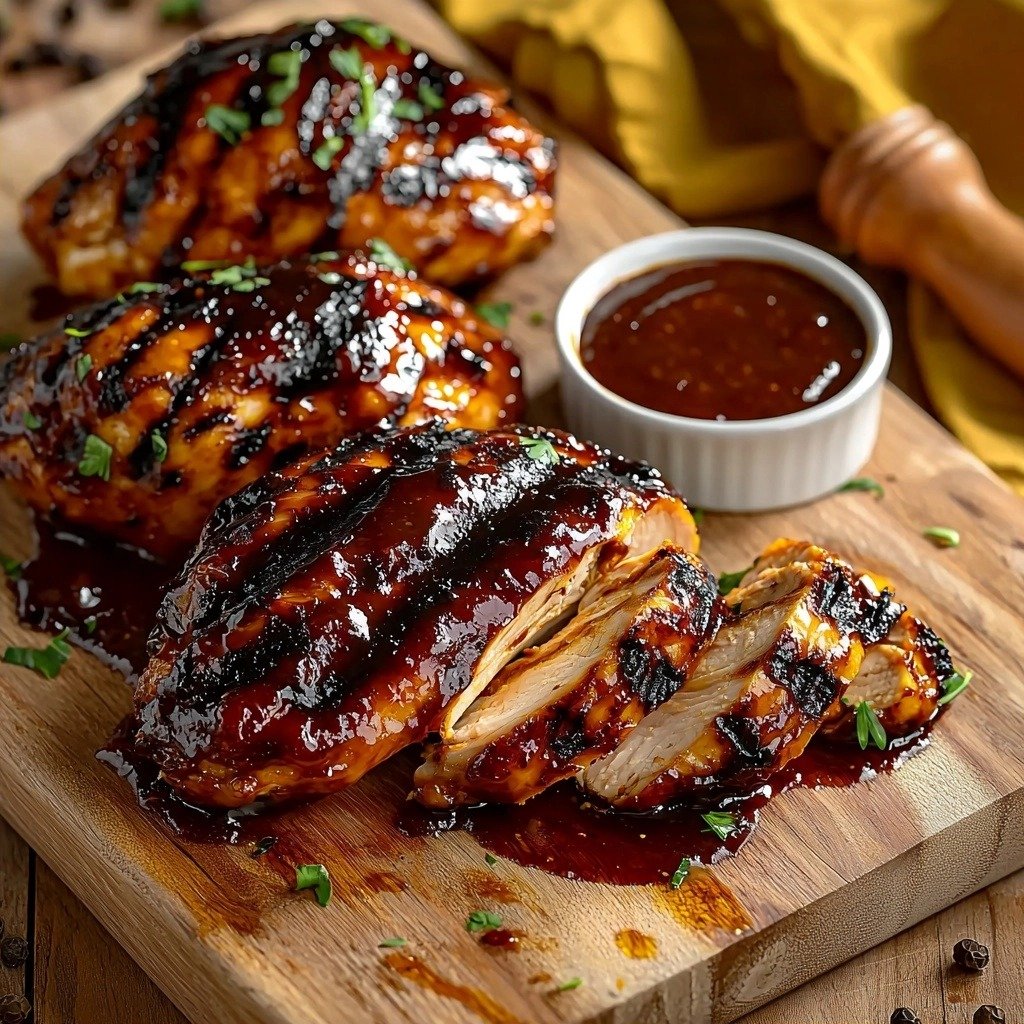
Why You’ll Love This Quick Grilled BBQ Chicken
- It’s incredibly tender and juicy, thanks to a few simple tricks!
- The flavor is out of this world – smoky, savory, and perfectly sweet from the BBQ sauce.
- It comes together so fast, making it perfect for weeknight meals or last-minute potlucks.
- You can grill it or bake it, so it works no matter the weather!
Ingredients You’ll Need
- Chicken Breasts: We’re using boneless, skinless chicken breasts. Pounding them to an even thickness is key for even cooking and super tender results.
- Extra Virgin Olive Oil: This helps the seasonings stick and keeps the chicken moist. Any neutral cooking oil would work in a pinch.
- Kosher Salt: I prefer kosher salt for its texture and how it seasons meat, but regular table salt can be used – just use a little less as it’s saltier by volume.
- Freshly Ground Black Pepper: Freshly ground makes a big difference in flavor, but pre-ground is fine too.
- Garlic Powder: A staple for adding that warm, savory garlic flavor without the risk of fresh garlic burning on the grill.
- Smoked Paprika: This is a secret weapon! It adds a beautiful smoky depth that really complements the BBQ flavor. Don’t skip it if you can help it.
- BBQ Sauce: Use your favorite! I love a classic, slightly sweet and tangy sauce like Sweet Baby Ray’s, but any brand you enjoy will be delicious here.
How to Make Quick Grilled BBQ Chicken Step by Step
First things first, grab your chicken breasts and pat them really, really dry with paper towels. This might seem like a small step, but trust me, it helps create that amazing sear and crust we all love. While you’re doing that, in a small bowl, mix together your kosher salt, black pepper, garlic powder, and smoked paprika. This is your flavor powerhouse!
Now, take your chicken and rub it all over with olive oil. Don’t be shy! Then, sprinkle that spice mixture generously over both sides of the chicken. You want a nice, even coating. I always season right before cooking because it keeps the chicken from drying out. This is where all that beautiful flavor starts to build!
Time to get cooking! If you’re grilling, preheat your grill to medium-high heat, aiming for about 450°F. Let those grates get good and hot for at least 5 minutes, then lightly oil them to prevent sticking. If you’re baking, preheat your oven to 450°F and place a rimmed baking sheet inside to get hot too. For grilling, place the seasoned chicken directly on the hot grill and let it cook for 5-6 minutes without touching it. This is where those gorgeous grill marks happen! If you’re baking, put the chicken on that preheated baking sheet and bake for 8 minutes.
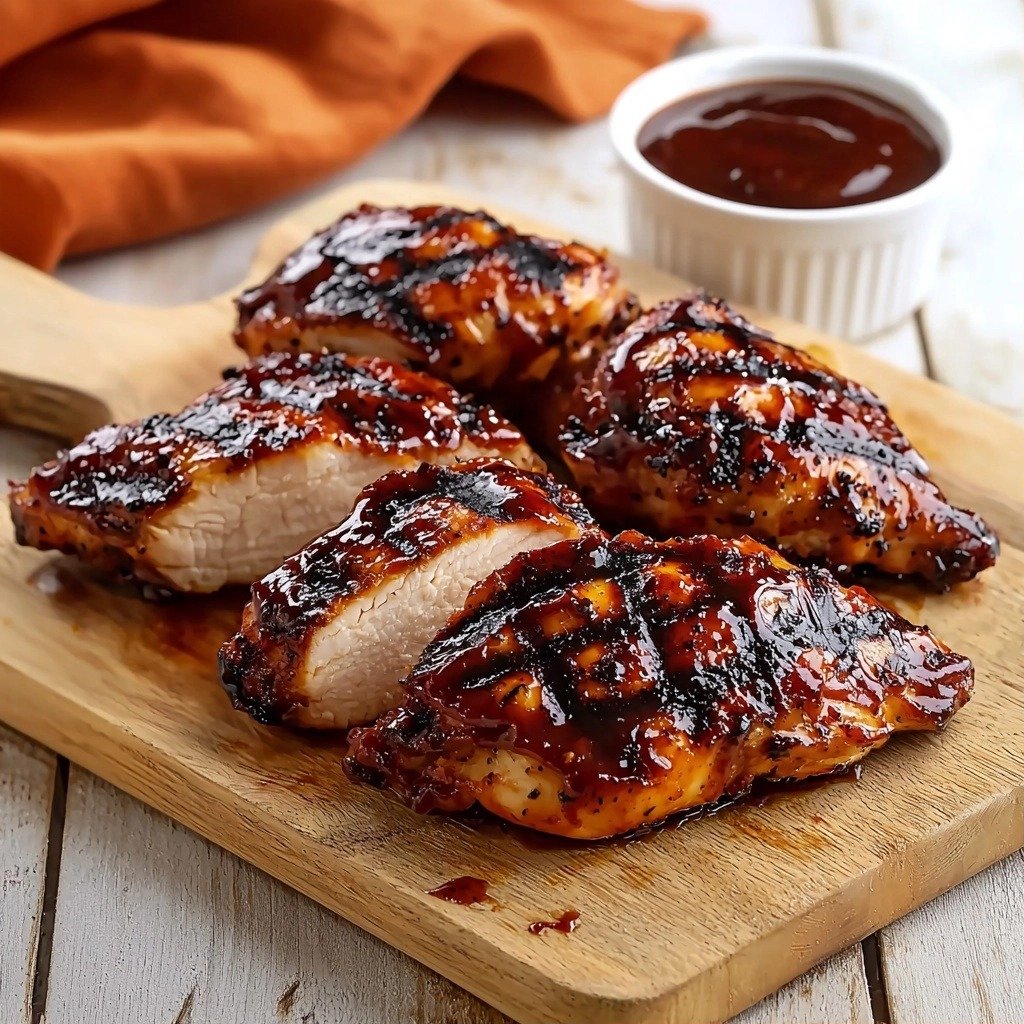
Next, flip your chicken! It should have a nice crust. Cook it for another 4-5 minutes on the grill, or bake it for another 7 minutes in the oven. The chicken should be mostly cooked through at this point. Now, for the magic! Brush both sides generously with your favorite BBQ sauce. I like to do two thin coats instead of one thick one – it helps prevent burning and creates a lovely caramelized glaze. Cook for just 2 more minutes per side on the grill, or 5-8 minutes total in the oven, until the internal temperature reaches 160°F. Use a meat thermometer to be sure! Finally, transfer your delicious chicken to a clean plate and let it rest for 5 minutes. This little rest is super important for juicy, tender chicken every time.
My Top Tips for Success
- I always pound my chicken breasts to an even thickness; it guarantees they cook at the same rate and stay super tender.
- In my experience, patting the chicken dry with paper towels is a non-negotiable step for a good sear.
- Don’t move the chicken for the first 5-6 minutes on the grill – that’s how you get those beautiful, professional-looking grill marks!
- Trust me on this one: applying BBQ sauce in two thin coats prevents burning and builds better flavor than one thick layer.
- Always, always use a meat thermometer to check for doneness. Aim for 160°F before resting.
- Letting the chicken rest for 5 minutes after cooking is crucial for juicy results; don’t skip it!
Common Mistakes to Avoid
- Overcooking the Chicken: This is the biggest culprit for dry chicken. Use a meat thermometer and pull it off the heat when it reaches 160°F before resting.
- Not Pounding Chicken to Even Thickness: If pieces are different thicknesses, some will be dry while others are still undercooked. Pound them evenly!
- Flipping Too Soon: If you try to flip the chicken before it’s ready, it will stick. Let it cook undisturbed to form a crust, and it will release easily.
- Applying BBQ Sauce Too Early: Sugar in BBQ sauce burns easily. Add it towards the end of cooking to get that perfect glaze without charring.
- Not Letting Chicken Rest: Cutting into the chicken immediately lets all the juices escape. Resting allows them to redistribute, keeping the chicken moist.
How to Store Quick Grilled BBQ Chicken
- Refrigerator: Leftover Quick Grilled BBQ Chicken can be stored in an airtight container in the refrigerator for up to 3-4 days.
- Freezer: For longer storage, wrap individual pieces tightly in plastic wrap, then place in a freezer-safe bag or container for up to 2-3 months. Thaw overnight in the refrigerator before reheating.
- Reheating: Gently reheat in the microwave, oven (at 325°F until warmed through), or on the stovetop with a splash of water or broth to prevent drying out.
Frequently Asked Questions
Can I use chicken thighs instead of breasts?
Yes, absolutely! Chicken thighs are delicious grilled. They might take a little longer to cook, so adjust your cooking times and always check for an internal temperature of 175°F. You’ll still want to pat them dry and season them well.
What if I don’t have a grill?
No problem at all! This recipe includes instructions for baking in the oven. Just preheat your oven to 450°F with a baking sheet inside, and follow the baking times listed in the recipe. It’ll still be wonderfully flavorful!
How do I know when the chicken is cooked through?
The best way is to use a meat thermometer. Insert it into the thickest part of the chicken breast, avoiding any bone. It should read 160°F before resting. This ensures it’s safe to eat and perfectly juicy.
Can I marinate the chicken in the BBQ sauce?
I don’t recommend marinating in BBQ sauce because of the sugar content. The sugar can burn easily on the grill. It’s best to apply the sauce towards the end of the cooking process to get that beautiful sticky glaze without charring.
What sides go well with this Quick Grilled BBQ Chicken?
So many things! I love serving it with a fresh corn salad, creamy coleslaw, baked potatoes, or some grilled veggies. It’s truly versatile and pairs well with most classic summer sides.
I hope this Quick Grilled BBQ Chicken becomes a new favorite in your kitchen, just like it has in mine! It’s such a simple way to get a flavorful, satisfying meal on the table. If you give it a try, I’d love to hear how it turned out for you!
PrintQuick Grilled BBQ Chicken
Tender, juicy, and perfectly glazed chicken breasts cooked fast on the grill or in the oven, bursting with smoky BBQ flavor.
- Prep Time: 10
- Cook Time: 15
- Total Time: 25
- Yield: 4 servings
- Category: Dinner
- Method: Grilling, Baking
- Cuisine: American
Ingredients
- 4 chicken breasts (pounded to an even 1-inch thickness)
- 2 tablespoons extra virgin olive oil
- 1 1/2 teaspoons kosher salt
- 1 teaspoon freshly ground black pepper
- 1/2 teaspoon garlic powder
- 1/2 teaspoon smoked paprika
- 3/4 cup BBQ sauce (such as Sweet Baby Ray's)
Instructions
- Pat the pounded chicken breasts dry with paper towels.
- Combine the kosher salt, black pepper, garlic powder, and smoked paprika in a small bowl.
- Rub the chicken breasts evenly on both sides with the olive oil.
- Generously coat the chicken breasts with the spice mixture.
- Preheat your grill to medium-high heat (around 450°F) or preheat your oven to 450°F.
- If grilling, allow the grates to heat for at least 5 minutes.
- Lightly oil the grill grates to prevent sticking.
- If baking, place a rimmed baking sheet in the oven to preheat as well.
- For grilling: Place the seasoned chicken breasts directly on the hot grill.
- Cook the chicken for 5-6 minutes without moving them.
- For baking: Place the seasoned chicken on the preheated baking sheet.
- Bake the chicken for 8 minutes.
- Flip the chicken breasts.
- Cook for 4-5 minutes on the second side (if grilling).
- Bake for another 7 minutes (if using the oven).
- Brush both sides of the chicken generously with the BBQ sauce.
- Cook for 2 minutes per side on the grill.
- Cook for 5-8 minutes total in the oven.
- Continue cooking until the internal temperature reaches 160°F when checked with a meat thermometer.
- Transfer the cooked chicken to a clean plate.
- Let the chicken rest for 5 minutes before serving.
Notes
Pound chicken to an even thickness for uniform cooking.
Pat chicken dry for a better sear and crispier exterior.
Season chicken right before cooking to prevent drying out.
Use a meat thermometer to ensure chicken reaches 160°F before resting.