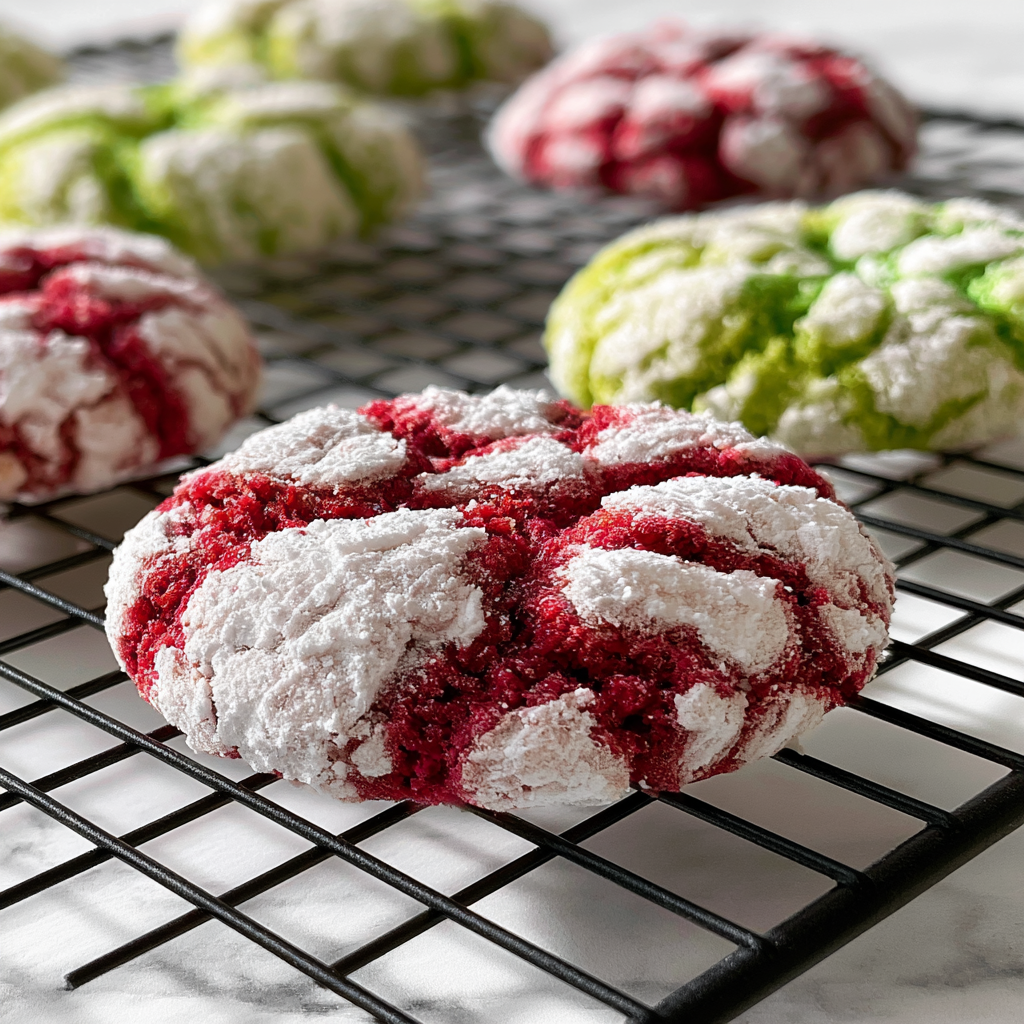
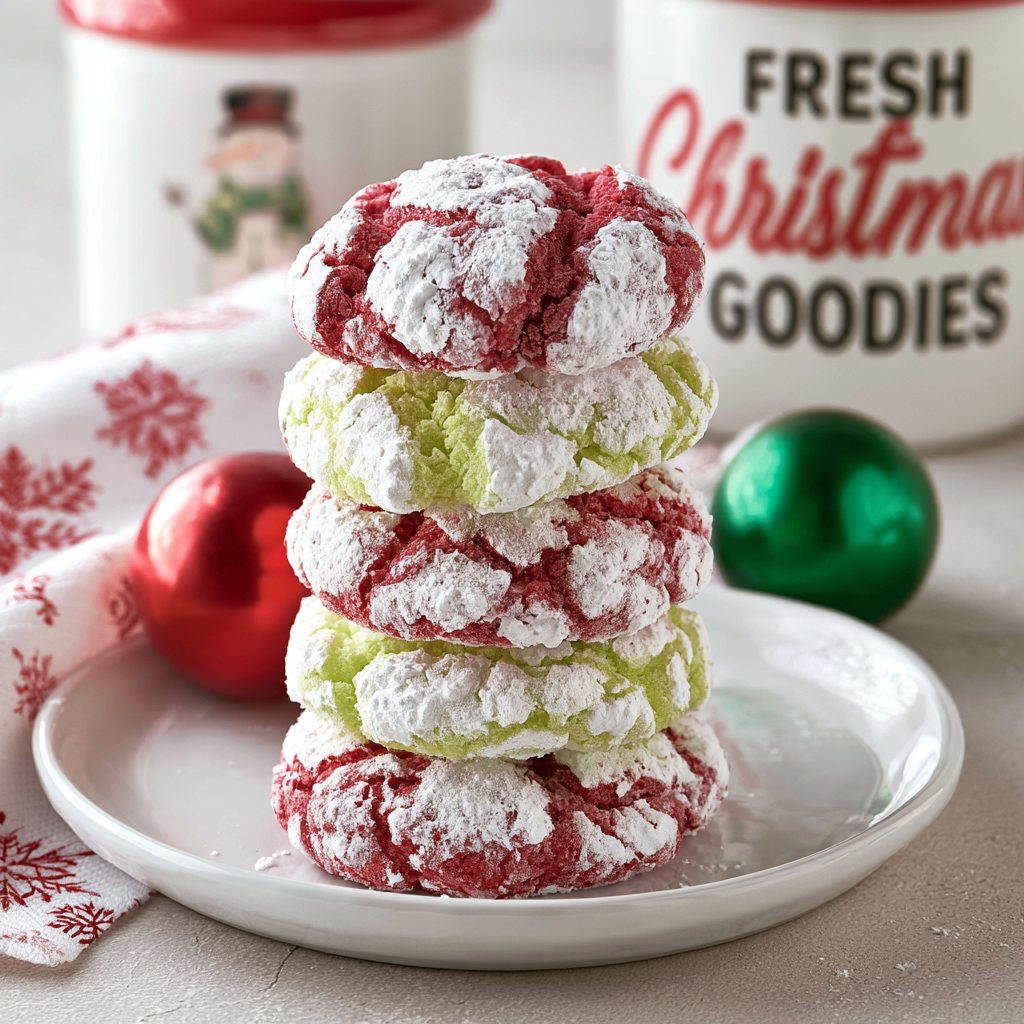
The holidays just aren’t complete without a little magic, are they? For me, that magic often comes in the form of baking. Every December, I pull out my favorite recipes, and these vibrant Christmas Crinkle Cookies are always at the top of the list. They bring back so many cozy memories of baking with my family, and that pop of red and green just screams festive joy!
Why You’ll Love This Christmas Crinkle Cookies
- They’re super easy to make, even if you’re new to baking.
- The cake mix base makes them incredibly soft and chewy.
- That powdered sugar coating gives them a beautiful, snowy look.
- They’re perfectly festive for any holiday gathering or cookie exchange.
Ingredients You’ll Need
- White Cake Mix: This is our secret weapon for a wonderfully soft and easy cookie base. Don’t substitute with other cake mix flavors if you want that classic crinkle cookie taste!
- Eggs: They bind everything together and add richness.
- Vanilla Extract: Just a touch enhances all the other flavors. Use pure vanilla for the best taste.
- Vegetable Oil: This keeps our cookies moist and helps achieve that perfect texture. You can use another neutral oil like canola if you prefer.
- Wilton Red Food Coloring Gel & Wilton Green Food Coloring Gel: Gel food coloring gives you vibrant colors without adding too much liquid to the dough. Liquid food coloring might not give you the same intense hues.
- Powdered Sugar: This is what creates that iconic “crinkle” effect! Don’t use granulated sugar here.
How to Make Christmas Crinkle Cookies Step by Step
First things first, let’s get our oven ready. Preheat it to 375 degrees Fahrenheit. While that’s heating up, grab a baking sheet and line it with a silicon baking mat or some parchment paper. This will make sure our cookies don’t stick and clean-up is a breeze!
Now for the dough! In a large bowl, combine your eggs, vegetable oil, vanilla extract, and the entire box of white cake mix. Mix it all together until you have a nice, cohesive dough. You can use an electric hand mixer for this, or just a good old spoon and some elbow grease. Once it’s mixed, divide that dough into two equal portions and put each into its own small bowl. This is where the magic happens!
In one bowl, add a few drops of red food coloring gel. In the other, add a few drops of green. Mix each color into the dough until it’s fully incorporated. If you want a deeper color, just add one drop at a time until you’re happy. Don’t worry if your hands get a little colorful — it’s all part of the fun! Pop both bowls of dough into the fridge for at least 30 minutes. This chilling time is super important; it makes the dough easier to handle and helps your cookies turn out extra fluffy. Once chilled, use a medium cookie scoop to portion out the dough, roll each ball in powdered sugar until it’s completely coated, and place them on your prepared baking sheet. Bake them for about 9-11 minutes. Remember, every oven is a little different, so start checking at 9 minutes. Let them cool for a minute or two on the baking sheet before moving them to a cooling rack.
My Top Tips for Success
- I always use gel food coloring for these; it gives such vibrant colors without thinning out the dough.
- Don’t skip the chilling step! In my experience, it makes a huge difference in how easy the dough is to work with and the final texture.
- Be generous with the powdered sugar coating. Trust me on this one, that’s what gives them their signature crinkly look.
- If your dough feels too sticky after chilling, about one tablespoon of flour mixed in can help.
- Watch your cookies closely in the oven. They should be set around the edges but still soft in the middle for that perfect chewiness.
Common Mistakes to Avoid
- Not chilling the dough: If you skip this, your dough will be very sticky and hard to roll, and your cookies might spread too much. Chill for at least 30 minutes.
- Not coating thoroughly in powdered sugar: This is crucial for the crinkle effect. Make sure each ball is completely covered.
- Overbaking the cookies: This will result in dry, hard cookies. Pull them out when the edges are just set and the centers still look slightly soft.
- Using liquid food coloring: Liquid food coloring can alter the dough’s consistency and won’t give as vibrant a color as gel.
How to Store Christmas Crinkle Cookies
- At room temperature: Store in an airtight container for up to 3-4 days.
- In the freezer (baked): Place cooled cookies in an airtight freezer-safe container or bag for up to 2-3 months. Thaw at room temperature.
- In the freezer (dough): Form dough balls, coat in powdered sugar, and freeze on a baking sheet. Once solid, transfer to a freezer-safe bag. Bake from frozen, adding a few extra minutes to the bake time.
Frequently Asked Questions
Can I make these cookies ahead of time?
Absolutely! You can prepare the dough, chill it, and even roll the balls in powdered sugar a day in advance. Store them in the fridge, then bake as directed when ready.
Why aren’t my cookies crinkling?
The most common reason is not enough powdered sugar or the dough wasn’t chilled enough. Make sure each dough ball is heavily coated in powdered sugar before baking.
Can I use a different color food coloring?
Yes, you can! Feel free to experiment with any gel food coloring you like to match other holidays or themes. You could even do St. Patrick’s Day Crinkle Cookies with green!
What if I don’t have a cookie scoop?
No problem! You can use a spoon to portion out roughly equal amounts of dough. Aim for about 1.5 tablespoons per cookie for consistent baking.
My cookies are too flat. What went wrong?
Flat cookies usually mean your dough was too warm or you didn’t use enough flour. Ensure your dough is well-chilled, and if it’s still too soft, add about one tablespoon of flour.
I hope these delightful Christmas Crinkle Cookies bring a little extra sparkle and sweetness to your holiday season. They’re truly a joy to make and even more fun to share! If you give this recipe a try, I’d absolutely love to hear how they turned out for you.
PrintChristmas Crinkle Cookies
These festive, vibrant red and green cookies are made easy with a cake mix base, resulting in a soft, chewy texture and a beautiful powdered sugar crinkle.
- Prep Time: 45
- Cook Time: 11
- Total Time: 56
- Yield: 24 cookies
- Category: Dessert
- Method: Baking
- Cuisine: American
- Diet: Vegetarian
Ingredients
- 1 box (13.25 ounces) white cake mix
- 2 eggs
- 1 teaspoon vanilla extract
- ⅓ cup vegetable oil
- Wilton red food coloring gel
- Wilton green food coloring gel
- ⅓ cup powdered sugar
Instructions
- Preheat your oven to 375 degrees Fahrenheit.
- Line a baking sheet with a silicon baking mat or parchment paper.
- In a large bowl, mix together the eggs, vegetable oil, vanilla extract, and white cake mix.
- Divide the cookie dough into two equal amounts.
- Place each divided dough portion into a separate small bowl.
- Add a few drops of Wilton red food coloring gel to one bowl of dough.
- Mix the red food coloring into the dough until the color is fully incorporated.
- Add a few drops of Wilton green food coloring gel to the second bowl of dough.
- Mix the green food coloring into the dough until the color is fully incorporated.
- Refrigerate both bowls of dough for at least 30 minutes.
- Use a medium cookie scoop to measure out portions of the chilled dough.
- Roll each dough ball completely in powdered sugar.
- Place the sugar-coated dough balls onto the prepared baking sheet.
- Bake for 9-11 minutes at 375 degrees Fahrenheit.
- Allow the cookies to cool for 1-2 minutes on the baking sheet.
- Transfer the cookies to a cooling rack to cool completely.
Notes
Ensure your dough is well-chilled for easier handling and better texture.
Be generous when coating the dough balls in powdered sugar for a prominent crinkle.
Gel food coloring works best for vibrant colors without altering dough consistency.
Check cookies at the minimum bake time as oven temperatures can vary.