Christmas is my absolute favorite time of year, and one of the things I love most is baking treats that just scream “holiday cheer!” This year, I wanted something super festive, easy, and sure to bring smiles. That’s how I landed on this amazing Christmas Jello Poke Cake. It’s vibrant, delicious, and always a huge hit at our family gatherings. There’s just something so fun about those unexpected bursts of color and flavor in every bite!
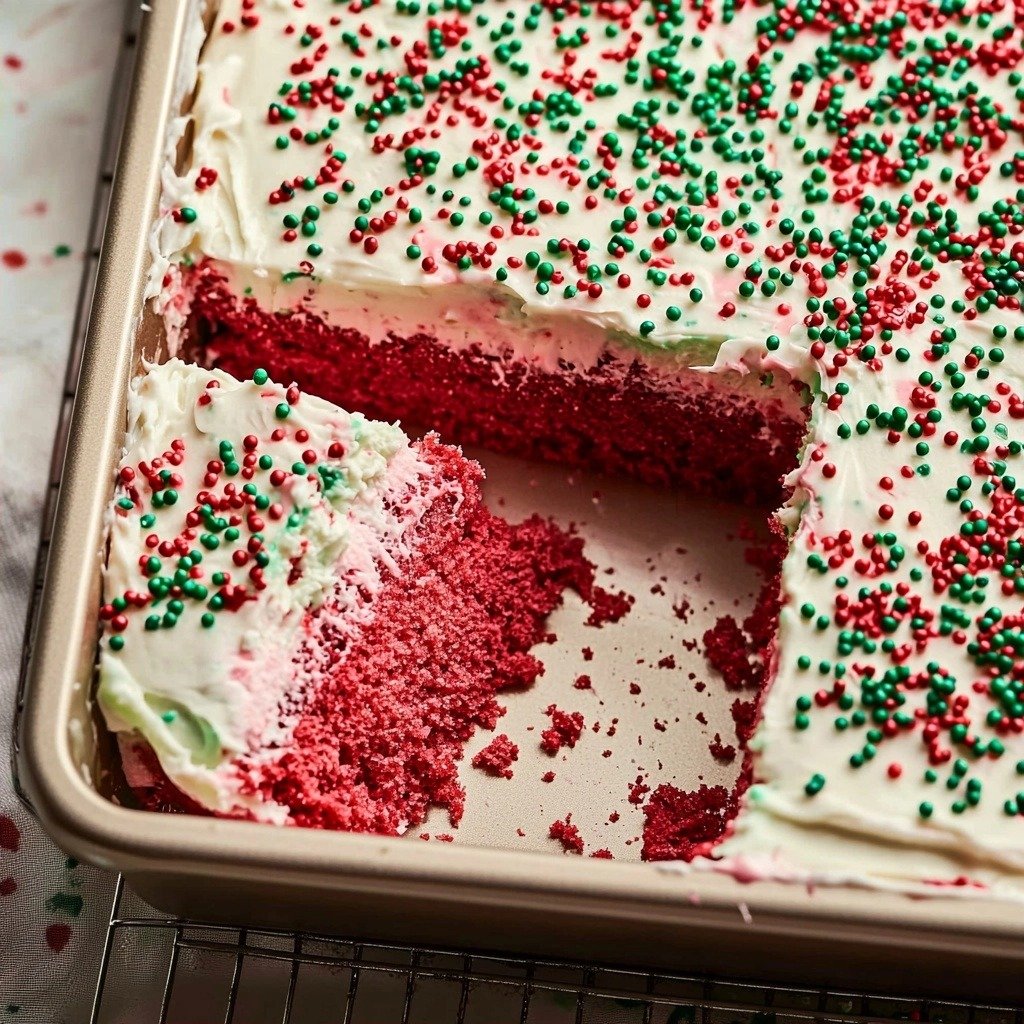
Why You’ll Love This Christmas Jello Poke Cake
- It’s incredibly festive with those bright red and green colors!
- So easy to make – perfect for busy holiday baking.
- The texture is amazing: moist cake, jiggly Jell-O, and creamy topping.
- It’s a total crowd-pleaser that everyone, especially kids, adores.
Ingredients You’ll Need
- White Cake Mix: This is our easy base! Just follow the package directions for whatever it calls for – usually eggs, oil, and water. You can absolutely use your favorite scratch white cake recipe instead if you prefer a homemade touch.
- Lime Jell-O and Cherry Jell-O: These are the stars that give our cake its festive color and fruity flavor. We’ll be using a little less cold water than the package suggests to make the Jell-O a bit firmer, which is perfect for poking!
- Cool Whip: This makes for a wonderfully light and creamy topping. Make sure it’s thawed before you spread it. If you’re feeling ambitious, homemade whipped cream is a fantastic substitute!
- Red and Green Sprinkles: These are for that final, magical holiday touch!
How to Make Christmas Jello Poke Cake Step by Step
First things first, get your white cake going! Prepare your favorite box of white cake mix exactly as the package tells you to. Pour it into a greased 9×13 inch pan and bake it according to the instructions. Once it’s baked, let it cool down on a wire rack for about 20 minutes. This is really important so it’s not too hot when we start poking!
Now for the fun part – poking holes! Grab a straw or the handle of a small wooden spoon and start poking holes all over the surface of your slightly cooled cake. Don’t be shy; you want lots of holes for that Jell-O goodness to seep into. Next, prepare your Jell-O. For each box, you’ll use 1 cup of boiling water to dissolve it completely, then stir in 1/2 cup of cold water. Remember, this is a bit less cold water than the package calls for, which helps the Jell-O set up better in the cake.
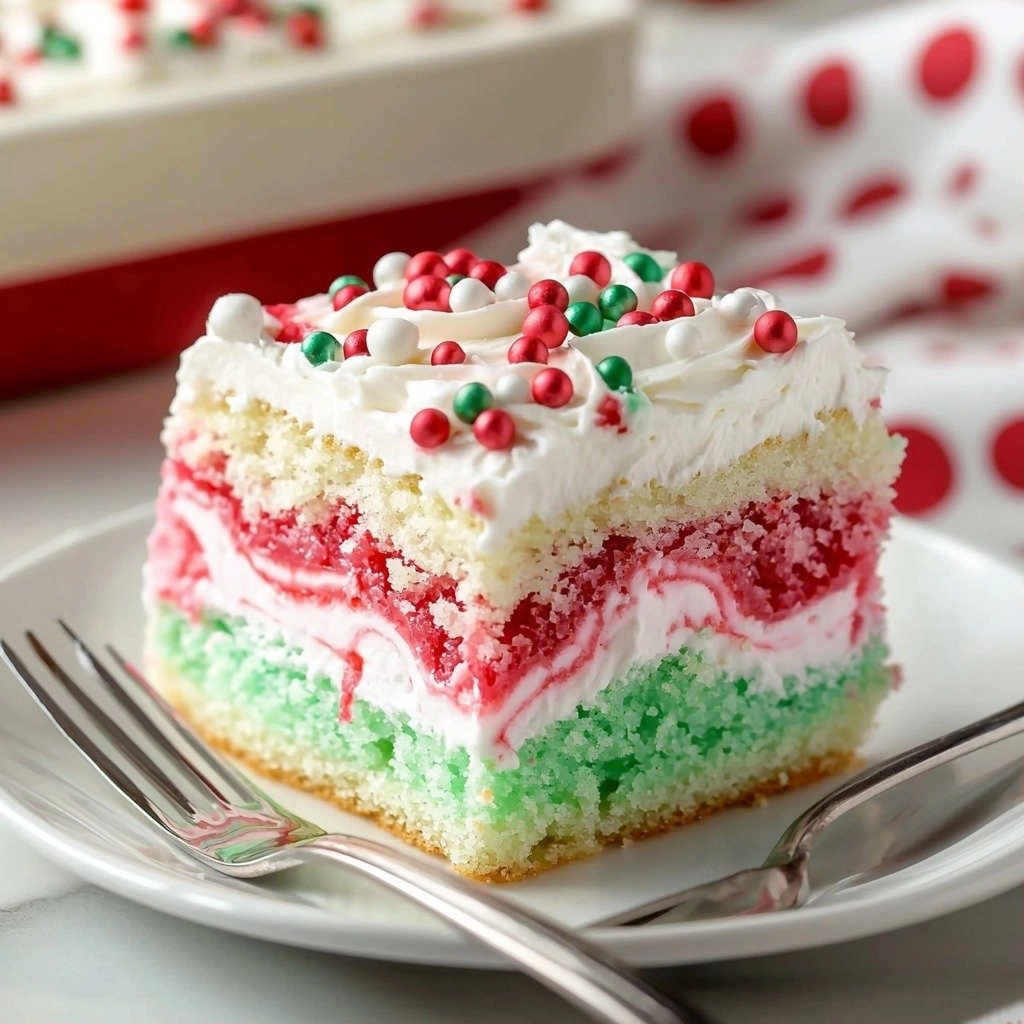
This is where the magic happens! Carefully pour or spoon the green Jell-O over one portion of the cake, making sure it gets right into those holes. Then, do the same with the red Jell-O over the other portion. Don’t worry if it looks a little messy at first; it will all come together. Once both colors are in, pop your cake into the refrigerator for at least 6 hours, or even better, overnight. This gives the Jell-O plenty of time to set up inside the cake, creating those beautiful, colorful streaks. When it’s fully set, spread your thawed Cool Whip evenly over the top and scatter those festive red and green sprinkles all over. Then, it’s ready to cut and enjoy!
My Top Tips for Success
- I always let the cake cool for at least 20 minutes before poking; too hot and the Jell-O might melt the cake too much.
- In my experience, using a straw makes the perfect size holes for the Jell-O to really soak in.
- Don’t skimp on the refrigeration time! Trust me, 6 hours is the minimum, but overnight truly makes a difference for the Jell-O to set perfectly.
- When pouring the Jell-O, go slowly and use a spoon if needed to guide it into the holes, especially for distinct color sections.
- If you’re using homemade whipped cream instead of Cool Whip, make sure it’s very cold and whipped to stiff peaks for the best stability.
Common Mistakes to Avoid
- Not cooling the cake enough: If the cake is too warm, the Jell-O can melt the cake and create a soggy mess instead of distinct Jell-O pockets. Always let it cool for at least 20 minutes.
- Using too much cold water for Jell-O: The package calls for more cold water, but we reduce it here. Using the full amount will result in Jell-O that’s too weak and won’t set properly in the cake.
- Not poking enough holes: If you don’t poke enough holes or they’re too shallow, the Jell-O won’t penetrate the cake well, and you’ll miss out on those fun, colorful streaks.
- Not refrigerating long enough: Pulling the cake out too early means the Jell-O won’t be fully set, leading to a runny cake. Patience is key!
How to Store Christmas Jello Poke Cake
- Refrigerator: Store covered tightly with plastic wrap in the refrigerator for up to 3-4 days.
- Freezer: While technically possible, the texture of the Jell-O can change upon thawing, becoming a bit watery. It’s best enjoyed fresh from the fridge.
Frequently Asked Questions
Can I use a different flavor of Jell-O?
Absolutely! Feel free to switch up the Jell-O flavors to suit your taste or occasion. Just make sure they’re contrasting colors for a fun visual effect.
Can I make this cake ahead of time?
Yes, this cake is perfect for making ahead! It needs at least 6 hours to chill, so preparing it the day before you plan to serve it is ideal.
What if I don’t have a straw for poking holes?
A small wooden spoon handle, a skewer, or even a chopstick works perfectly. Just aim for holes about 1/2 to 3/4 inch deep.
Can I use homemade whipped cream instead of Cool Whip?
Yes, homemade whipped cream is a delicious substitute! Just be aware that it might not hold its shape quite as long as Cool Whip, so add it closer to serving time.
Why is my Jell-O not setting in the cake?
This usually happens if the cake was too warm when the Jell-O was added, or if you used too much cold water when preparing the Jell-O. Ensure you follow the reduced cold water amount and chill the cake thoroughly.
I hope this festive Christmas Jello Poke Cake brings as much joy and color to your holiday table as it does to mine! It’s such a simple way to create something truly special. If you make it, I’d love to hear how it turned out and what your favorite part was!
PrintChristmas Jello Poke Cake

A festive and fun poke cake featuring vibrant red and green Jell-O flavors, topped with creamy Cool Whip and holiday sprinkles.
- Prep Time: 20
- Cook Time: 30
- Total Time: 410
- Yield: 12-16 servings
- Category: Dessert
- Method: Baking, No-Bake
- Cuisine: American
Ingredients
- 15 ounce box white cake mix + ingredients to make it (such as eggs, oil, etc – whatever it lists on the box)
- 3 ounce box Lime Jell-O
- 3 ounce box Cherry Jell-O
- 8 ounce tub Cool Whip, thawed
- red and green sprinkles
Instructions
- Prepare the white cake mix according to package directions.
- Bake the cake in a greased 9×13 inch pan as directed.
- Allow the cake to cool for about 20 minutes.
- Using a straw or the handle of a small wooden spoon, poke holes all over the surface of the cake.
- Prepare the Lime Jell-O by dissolving it in 1 cup of boiling water, then stir in 1/2 cup of cold water.
- Prepare the Cherry Jell-O by dissolving it in 1 cup of boiling water, then stir in 1/2 cup of cold water.
- Carefully pour or spoon the green Jell-O over one portion of the cake, ensuring liquid gets into the holes.
- Carefully pour or spoon the red Jell-O over the other portion of the cake, ensuring liquid gets into the holes.
- Refrigerate the cake for at least 6 hours, or ideally overnight, to allow the Jell-O to set.
- Spread the top evenly with the thawed Cool Whip.
- Add red and green holiday sprinkles on top.
- Cut into squares and serve.
Notes
Ensure the cake is slightly cooled before poking holes so the Jell-O doesn’t melt the cake.
Reduce the cold water for the Jell-O to help it set firmer within the cake.
Refrigerate for at least 6 hours; overnight is best for optimal Jell-O setting.
Guide the Jell-O into the holes carefully with a spoon for distinct color sections.