Oh, the holidays! There’s just something magical about this time of year, isn’t there? For me, it’s not truly Christmas until my kitchen is filled with the sweet scent of baking and a little bit of creative chaos. Every year, I love making these adorable Christmas Tree Cookies. They’re so light and airy, and honestly, they just make everyone smile. They’ve become a beloved tradition in our home, bringing a little bit of festive cheer to our dessert table.
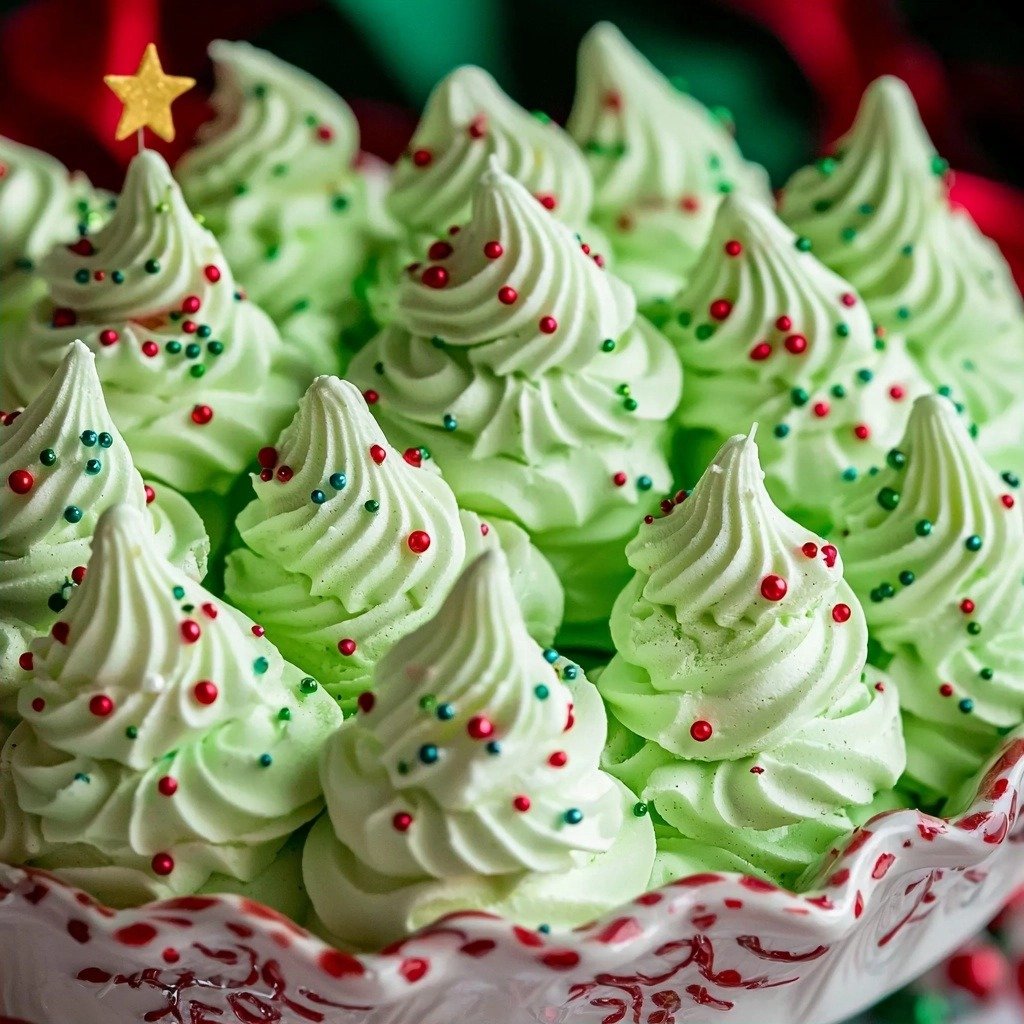
Why You’ll Love These Christmas Tree Cookies
- They’re super light and melt-in-your-mouth delicious!
- So much fun to decorate, especially with little helpers.
- The perfect festive treat for holiday parties or cozy nights.
- Surprisingly simple to make with just a few ingredients.
Ingredients You’ll Need
- Egg Whites: Make sure they’re at room temperature! This helps them whip up beautifully and incorporate air, giving your cookies that amazing light texture.
- Granulated Sugar: Not only sweetens, but also helps stabilize the egg whites, making your meringue sturdy.
- Cream of Tartar: This is your secret weapon for perfectly stable meringue. It helps the egg whites whip up faster and holds those stiff peaks.
- Almond Extract: Adds a lovely, delicate flavor that pairs wonderfully with the sweet meringue. You could try vanilla if you prefer, but almond is classic here.
- Green Gel Food Coloring: Gel coloring gives you vibrant color without adding too much liquid, which can affect the meringue’s consistency.
- Sprinkles: Multi-color and star sprinkles are for decoration! Use whatever festive sprinkles make you happy.
- Frosting of your choice: Just a tiny dab is needed for the star on top, so even a store-bought tube will work!
How to Make Christmas Tree Cookies Step by Step
First things first, let’s get your oven ready. Preheat it to a low 200 degrees Fahrenheit. This slow, low heat is key to drying out your meringue cookies perfectly, not baking them. Next, grab a heatproof bowl – I use the bowl of my stand mixer for this – and combine your room temperature egg whites, granulated sugar, and a pinch of cream of tartar. Place this bowl right over a pot of gently boiling water on your stove. You don’t want the bowl to touch the water, just hover above the steam.
Now, whisk vigorously! You’ll keep whisking until all the sugar has completely dissolved. You can test this by rubbing a little bit of the mixture between your fingers; if it feels smooth with no gritty sugar granules, you’re good to go. This step is super important for a smooth, stable meringue. Once dissolved, remove the bowl from the heat and stir in your almond extract. Don’t worry if it still looks a bit runny at this point; the magic is about to happen!
Transfer your bowl to your stand mixer and attach the whisk attachment. Start mixing on medium-high speed. Watch as those egg whites transform! They’ll become bright white and start to thicken, but they’ll still be a bit runny. This is where you add your green gel food coloring. Add it a little at a time until you get the vibrant Christmas tree green you desire. Continue beating until you achieve stiff peaks – that means when you lift the whisk, the meringue holds its shape firmly. This is where your beautiful Christmas Tree Cookies get their structure!
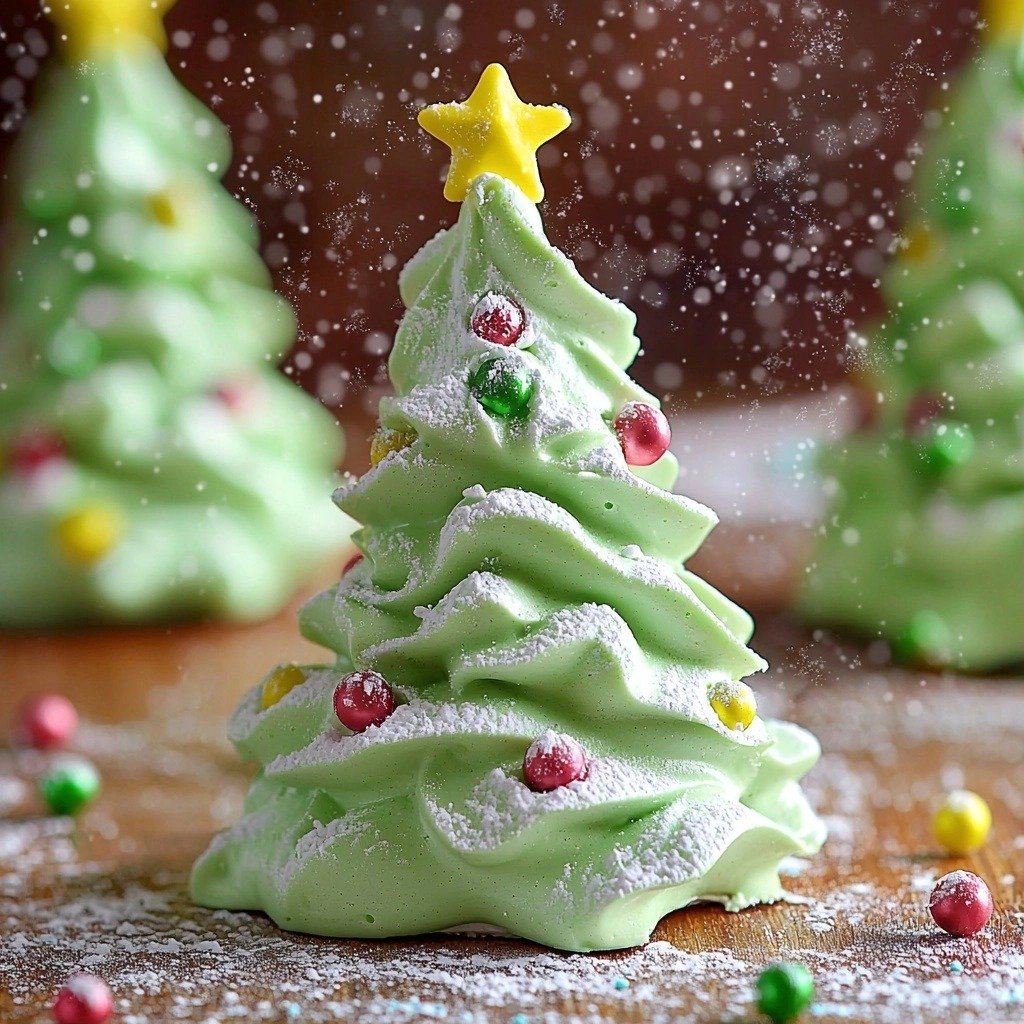
Time to pipe! Spoon your green meringue mixture into a piping bag fitted with a large star tip. On a baking sheet lined with parchment paper or a silicone mat, pipe your cookies. Aim for about 1 inch wide and 2 inches high, leaving about 1 inch between each cookie. These don’t spread much, so don’t worry too much about them touching. As soon as they’re piped, sprinkle them with your multi-color sprinkles. Now, into the preheated oven they go for 2 hours. After that, turn off the oven, crack the door slightly, and let them sit in there for another 2 hours. This helps them dry out completely and become crisp. Once cooled, a tiny dab of frosting and a star sprinkle on top finishes them off perfectly!
My Top Tips for Success
- I always make sure my egg whites are at room temperature; it makes a huge difference in how well they whip.
- In my experience, using gel food coloring instead of liquid keeps the meringue from getting too watery.
- Trust me on this one: don’t skip the step of dissolving the sugar over the double boiler. It prevents grainy meringue.
- Make sure your mixing bowl and whisk are absolutely grease-free! Any fat can prevent egg whites from whipping properly.
- Don’t rush the drying time in the oven. That slow cool-down is crucial for crisp cookies.
Common Mistakes to Avoid
- Not dissolving the sugar completely: This leads to a grainy, less stable meringue. Keep whisking over the double boiler until you can’t feel any sugar crystals between your fingers.
- Using cold egg whites: Cold egg whites won’t whip up as much volume as room temperature ones. Plan ahead and take them out of the fridge.
- Over-whipping the meringue: While you want stiff peaks, whipping too long can make the meringue dry and brittle, leading to cracking when piped or baked. Stop as soon as the peaks are firm.
- Opening the oven door too soon: Resist the urge! Opening the door during the initial baking or the cooling period can cause the cookies to crack or deflate due to sudden temperature changes.
- Greasy equipment: Even a tiny bit of fat on your bowl or whisk can prevent the egg whites from whipping. Give everything a good wash.
How to Store Christmas Tree Cookies
- Airtight container at room temperature: Up to 1 week. Keep them in a single layer or separate layers with parchment paper to prevent crushing.
- Freezing (un-decorated): Up to 1 month. Place in an airtight container, layered with parchment. Thaw at room temperature before decorating.
Frequently Asked Questions
Can I use liquid food coloring?
While you can, I highly recommend gel food coloring. Liquid coloring adds more moisture, which can make your meringue less stable and harder to achieve stiff peaks.
What if my meringue won’t form stiff peaks?
This usually happens if your egg whites weren’t at room temperature, there was a trace of fat in your bowl, or the sugar wasn’t fully dissolved. Keep whipping, but if it truly won’t stiffen, you might need to start over with fresh, clean equipment.
Why did my cookies crack?
Cracking can occur if the oven temperature is too high, or if there’s a sudden change in temperature when cooling. Make sure your oven is accurate and follow the cooling instructions carefully.
Can I make these ahead of time?
Yes, absolutely! Meringue cookies store well in an airtight container at room temperature for up to a week. Just add the star sprinkles and frosting right before serving for the freshest look.
Do I have to use a stand mixer?
A stand mixer with a whisk attachment makes this much easier, but you can use a hand mixer. Just be prepared for a bit of an arm workout!
I hope these delightful Christmas Tree Cookies bring a little extra sparkle to your holiday season! They’re such a joy to make and even more fun to share. If you give them a try, please let me know how they turn out – I’d love to hear about your festive creations!
PrintChristmas Tree Cookies

Whimsical, melt-in-your-mouth meringue cookies shaped like Christmas trees, perfect for holiday celebrations.
- Prep Time: 20
- Cook Time: 240
- Total Time: 260
- Yield: About 30-40 cookies
- Category: Dessert
- Method: Baking
- Cuisine: American
- Diet: Vegetarian
Ingredients
- 4 egg whites at room temp
- 1 Cup granulated sugar
- pinch cream of tartar
- 1/8 tsp almond extract
- green gel food coloring
- multi color sprinkles
- star sprinkles
- frosting of your choice
Instructions
- Preheat your oven to 200 degrees Fahrenheit.
- Place egg whites, granulated sugar, and cream of tartar in a large heatproof bowl, preferably the bowl of your stand mixer.
- Set the bowl over a pot of gently boiling water on the stove; ensure the bottom of the bowl does not touch the water.
- Whisk the mixture vigorously and continuously until the sugar is completely dissolved and no granules are visible when rubbed between your fingers.
- Remove the bowl from the heat.
- Whisk in the almond extract.
- Attach the whisk attachment to your stand mixer.
- Beat the egg white mixture on medium-high speed until the egg whites become bright white and slightly thickened, but still runny.
- Add green gel food coloring a little at a time until you reach your desired Christmas tree green color.
- Continue to beat the mixture on medium-high speed until very stiff peaks form.
- Spoon the meringue mixture into a piping bag fitted with a large star tip.
- Pipe cookies onto a baking sheet lined with parchment paper or a silicone mat.
- Form cookies that are approximately 1 inch in width and 2 inches high.
- Space the cookies about 1 inch apart on the baking sheet.
- Immediately sprinkle the piped cookies with multi-color sprinkles.
- Place the baking sheet in the preheated oven and bake for 2 hours.
- After 2 hours, turn off the oven.
- Slightly open the oven door and let the cookies sit in the cooling oven for an additional 2 hours to dry out completely.
- Once cooled, place a star sprinkle on top of each cookie using a tiny dab of frosting to secure it.
- Serve and enjoy your festive Christmas Tree Cookies!
Notes
Ensure all your equipment (bowls, whisks) are completely clean and grease-free, as any fat can prevent egg whites from whipping.
Do not open the oven door during the baking or cooling process, as sudden temperature changes can cause the meringue to crack.
For best results, use room temperature egg whites; they whip to a higher volume.
Store cooled, undecorated meringue cookies in an airtight container at room temperature for up to a week.