There’s just something magical about Christmas, isn’t there? The twinkling lights, the cozy sweaters, and of course, all the delicious treats! For me, the holidays aren’t complete without a batch of homemade goodies, and this year, my kitchen is filled with the sweet aroma of chocolate as I whipped up my absolute favorite Christmas Rocky Road. It’s a tradition now, one that fills our home with cheer and our bellies with pure joy.
Why You’ll Love This Christmas Rocky Road
- It’s incredibly easy to make, even if you’re new to baking!
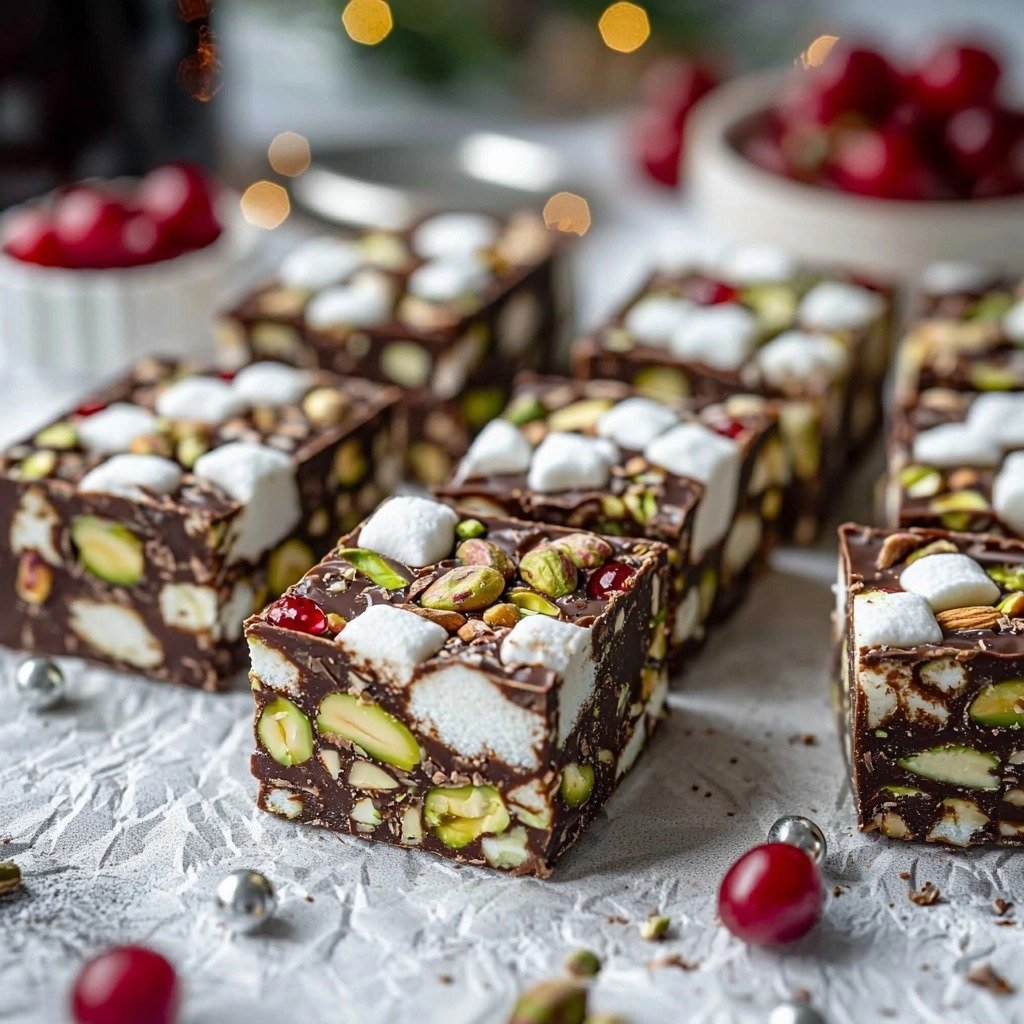
- The combination of creamy chocolate, chewy marshmallows, crunchy nuts, and sweet cherries is just divine.
- It’s a fantastic make-ahead treat, perfect for gifting or holiday parties.
- Everyone, from kids to adults, absolutely adores this festive delight.
Ingredients You’ll Need
- Milk and Dark Chocolate: We’re using a mix for the perfect balance of sweetness and rich chocolatey depth. Make sure to chop them into even pieces for smooth melting.
- Desiccated Coconut: This adds a lovely texture and a subtle tropical hint. Don’t confuse it with shredded coconut – desiccated is much finer.
- White Marshmallows: Quartering them helps distribute that soft, chewy goodness throughout every bite.
- Pistachios: Unsalted and shelled, please! They add a beautiful green color and a fantastic crunch.
- Glacé/Candied Red Cherries: These are the stars of the Christmas show, adding a festive pop of color and a sweet, chewy texture. Halve them to get more cherry in every piece.
- White Chocolate: For that pretty drizzle on top!
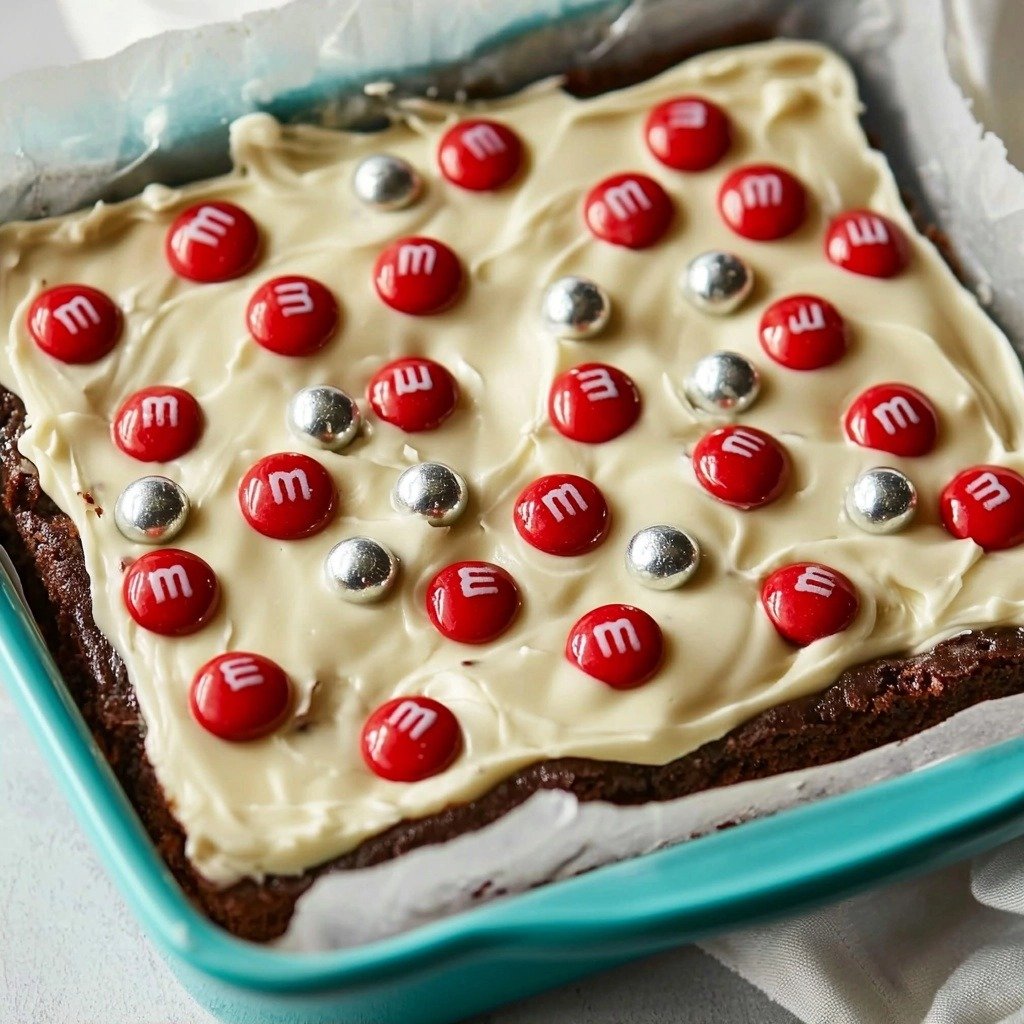
- Red M&M’s and Silver Cachous: These are for decorating, adding that extra festive sparkle and a bit of crunch.
How to Make Christmas Rocky Road Step by Step
First things first, let’s get our tin ready. Line an 18 cm x 13 cm (7 inch x 5 inch) slice tin with baking paper. This makes it super easy to lift out your rocky road later on. Then, grab a big bowl and toss in your desiccated coconut, those perfectly quartered marshmallows, the gorgeous pistachios, and the halved glacé cherries. Give it a gentle mix so everything is friends in there.
Now, for the chocolate magic! You’ll want to melt your milk and dark chocolate together. The best way to do this is using a bain-marie or a double boiler. Just place your chopped chocolate in a heatproof bowl over a pan of barely simmering water. Make sure the bowl doesn’t touch the water – we’re gently melting, not cooking! Stir it with a metal spoon or spatula until it’s almost completely melted. Then, take it off the heat; the residual warmth will melt the last bits. Don’t worry if it looks a little thick at first, it will come together beautifully.
Once your chocolate is all glossy and smooth, let it cool down for just a couple of minutes. This step is important! Then, pour that lovely melted chocolate into the bowl with your marshmallows, coconut, nuts, and cherries. Give it a really good stir until everything is completely coated in that rich chocolate. Pour this delicious mixture into your prepared tin and press it down gently with a spatula or the back of a spoon to flatten it out. Pop it into the refrigerator for 30 minutes to firm up a bit.
My Top Tips for Success
- I always chop my chocolate into small, even pieces. It helps it melt much more smoothly and evenly.
- In my experience, a good quality chocolate makes all the difference in taste. Treat yourself!
- Trust me on this one: don’t let your double boiler bowl touch the water. It can seize your chocolate.
- When cooling the melted chocolate, a minute or two is perfect. Too long and it might start to set!
- For easy cutting, I like to take the rocky road out of the fridge about 15-30 minutes before slicing.
- A warm, sharp knife is your best friend for clean cuts. Run it under hot water and wipe it dry between slices.
Common Mistakes to Avoid
- Overheating Chocolate: This can make your chocolate seize and become grainy. Always use a gentle heat, like a double boiler, and remove it from the heat when almost melted, letting residual heat do the rest.
- Not Cooling Chocolate Slightly: If you pour hot chocolate over your mix-ins, it can melt the marshmallows. Let it cool for a couple of minutes first.
- Uneven Mix-ins: Make sure to stir everything thoroughly so every piece of rocky road has a good mix of goodies.
- Cutting Too Soon: If it’s not fully set, it will be messy to cut. Give it the full 2 hours in the fridge.
How to Store Christmas Rocky Road
- Refrigerator: Store in an airtight container for up to 2 weeks.
Frequently Asked Questions
Can I use a different type of chocolate?
Yes, you can adjust the chocolate ratio to your liking. If you prefer sweeter, use more milk chocolate. For a richer taste, increase the dark chocolate.
Do I have to use glacé cherries?
While glacé cherries give it that classic Christmas look and taste, you can substitute them with other dried fruits like cranberries for a different festive twist.
Can I add other nuts?
Absolutely! Walnuts, almonds, or pecans would be delicious additions. Just make sure they are unsalted.
What if I don’t have a double boiler?
You can carefully melt chocolate in the microwave. Heat in 20-30 second intervals, stirring well after each, until smooth. Be very careful not to burn it!
How many pieces does this recipe make?
This recipe is designed to make about 10 generous pieces, perfect for sharing or enjoying over a few days.
I genuinely hope this Christmas Rocky Road brings a little extra sparkle to your holiday season! It’s such a simple, joyful treat to make and share. Give it a try, and let me know how much you loved it!
PrintChristmas Rocky Road

A festive, easy-to-make no-bake chocolate treat packed with marshmallows, pistachios, and glacé cherries, perfect for the holidays.
- Prep Time: 15
- Cook Time: 5
- Total Time: 140
- Yield: 10 pieces
- Category: Dessert
- Method: No-Bake
- Cuisine: American
Ingredients
- 200 g (7 oz) milk chocolate – cut into even pieces
- 100 g (3.5 oz) dark chocolate – cut into even pieces
- 20 g (¼ cup) desiccated coconut
- 80 g (1 cup) white marshmallows – quartered
- 45 g (⅓ cup) pistachios – unsalted/shells removed
- 100 g (½ cup) glacé/candied red cherries – halved
- 100 g (3.5 oz) white chocolate
- 2 tablespoon red m&m's – or other candy
- 1 teaspoon silver cachous
Instructions
- Line an 18 cm x 13 cm (7 inch x 5 inch) slice tin with baking paper.
- Place the desiccated coconut, quartered marshmallows, pistachios, and cherries in a bowl.
- Prepare a bain-marie or double boiler by placing a heatproof bowl over a pan of barely simmering water, ensuring the bowl does not touch the water.
- Add the chopped milk and dark chocolate pieces to the heatproof bowl.
- Stir the chocolate with a metal spoon or spatula until it has almost melted.
- Remove the bowl from the heat; the residual heat will melt the remaining chocolate.
- Let the melted chocolate cool for a couple of minutes.
- Pour the slightly cooled chocolate into the bowl with the marshmallows, coconut, pistachios, and cherries.
- Stir well until all ingredients are completely covered in the chocolate.
- Pour the mixture into the prepared tin.
- Flatten the top down with a spatula or metal spoon.
- Place the tin in the refrigerator for 30 minutes to chill slightly.
- In a clean bowl, melt the white chocolate.
- Drizzle the melted white chocolate over the slightly chilled rocky road.
- Decorate immediately with red m&m's and silver cachous.
- Place the tin back in the fridge for 2 hours, or until completely set.
- Remove the rocky road from the fridge 15-30 minutes before cutting for easier slicing.
- Cut the rocky road into 10 pieces using a warm, sharp knife.
- Store in an airtight container in the fridge.
Notes
Use good quality chocolate for the best flavor and texture.
Ensure your bowl doesn’t touch the water when melting chocolate to prevent seizing.
Let the melted chocolate cool slightly before mixing with other ingredients.
For clean cuts, warm your knife under hot water and wipe dry between slices.
Get creative with your toppings! Sprinkles, crushed candy canes, or different candies work great.