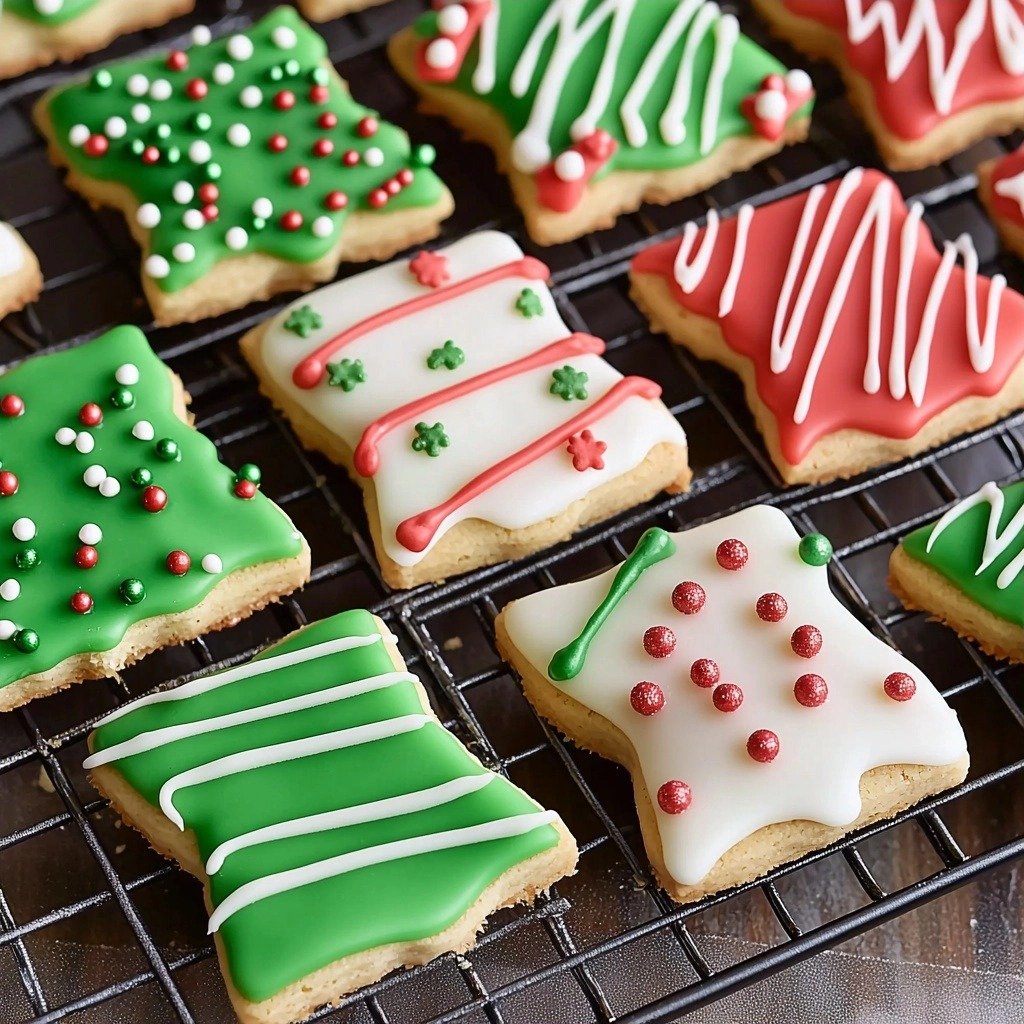
Oh, the holidays! There’s just something magical about this time of year, isn’t there? For me, it always means getting into the kitchen and baking up some joy. These Christmas Sugar Cookie Bars are a favorite tradition in our house. They’re so much easier than rolling out individual cookies, but you still get all that classic sugar cookie flavor with a beautiful, festive frosting. It’s the perfect treat to share with friends, family, or even just to have on hand for a cozy night in!
Why You’ll Love This Christmas Sugar Cookie Bars
- Super Easy: No rolling, no cutting out individual shapes! Just press, bake, and decorate.
- Soft & Chewy: These bars are perfectly soft and tender, not hard or crispy.
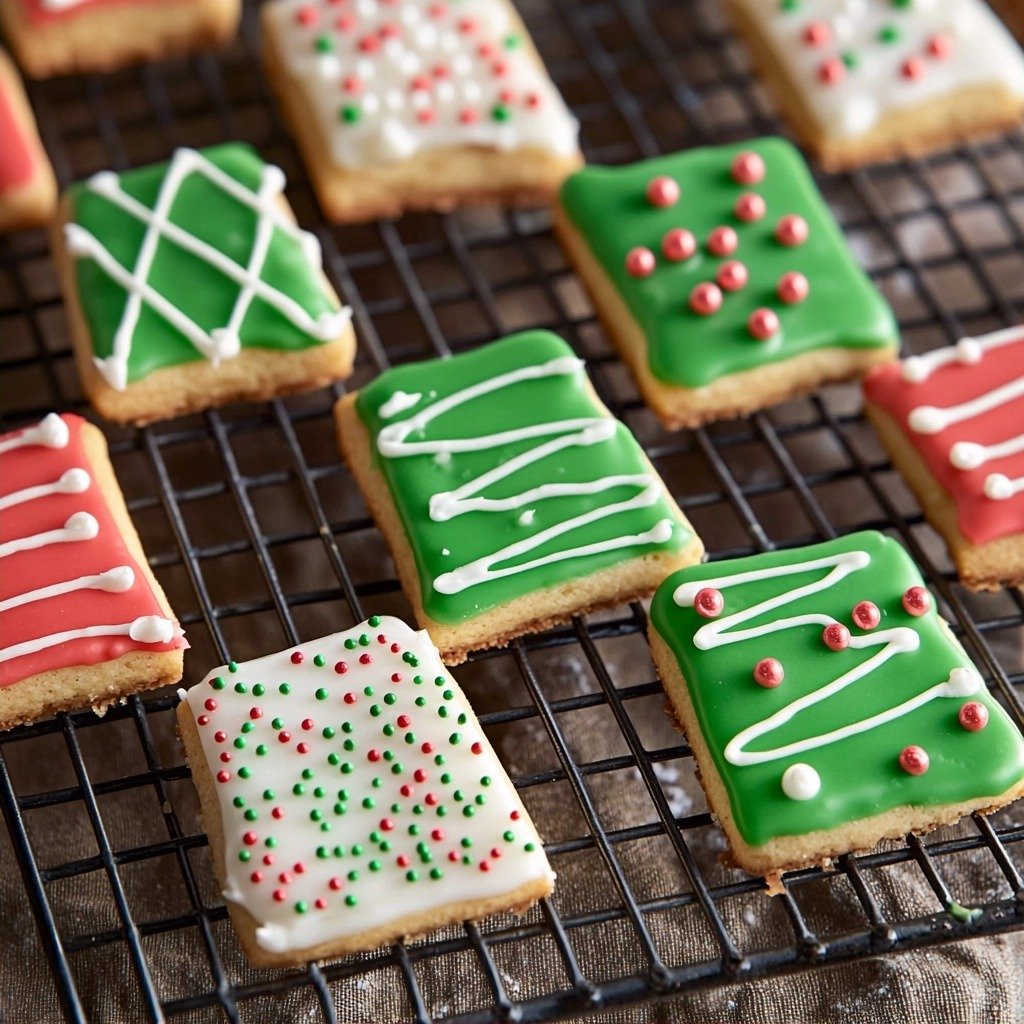
- Festive & Fun: The bright royal icing and sprinkles make them a holiday showstopper.
- Crowd-Pleaser: Everyone loves a good sugar cookie, and these bars feed a crowd effortlessly.
Ingredients You’ll Need
- Unsalted Butter: Melting the butter here makes for an incredibly soft, almost cake-like bar. Don’t use cold butter!
- Granulated Sugar: This is our main sweetener, giving that classic sugar cookie taste.
- Large Eggs: Make sure they’re at room temperature! This helps them combine smoothly with the other ingredients, creating a better texture.
- Vanilla Extract: Use good quality vanilla! It makes a big difference in flavor. Clear vanilla is great for the frosting if you want pure white icing.
- All-Purpose Flour: The structure of our bars. Make sure to measure it correctly – spoon it into your measuring cup and then level it off.
- Cornstarch: This is a secret ingredient for softness! It helps keep the bars tender and prevents them from getting too tough.
- Fine Sea Salt: Balances out the sweetness and brings out all the flavors.
- Powdered Sugar: Essential for our royal icing. It dissolves beautifully for a smooth, sweet frosting.
- Meringue Powder: This is key for royal icing! It helps the icing set firm and shiny, giving it that classic look and feel.
- Water: Used to thin the icing to the perfect consistency for dipping and decorating.
- Gel Food Coloring: Gel colors are much more vibrant than liquid drops and won’t thin out your icing too much. Red and green are perfect for Christmas!
How to Make Christmas Sugar Cookie Bars Step by Step
First things first, let’s get that oven ready! Preheat it to 350°F (180°C) and line a 9×13 inch metal baking pan with parchment paper. This parchment paper is your best friend for easy removal later. Now, grab a big bowl and whisk together your melted butter and granulated sugar until they’re nice and combined. Don’t worry if it looks a little oily at this stage, that’s totally normal!
Next, whisk in the eggs and that lovely vanilla extract. Make sure everything is well incorporated. This is where the magic starts to happen! Then, gently fold in your dry ingredients: the all-purpose flour, cornstarch, and fine sea salt. Mix it just until there are no dry streaks left – overmixing can make your bars tough, and we want them super soft.
Now for the fun part! Press that beautiful cookie dough evenly into your prepared pan. I like to lightly grease my hands to prevent sticking, then use an offset spatula to get it perfectly smooth from edge to edge. Pop it into your preheated oven and bake for 18-25 minutes. You’re looking for the edges to be barely golden brown and the center to be set. Take them out, let them cool completely on a wire rack, and then get ready for decorating!
My Top Tips for Success
- Measure Flour Correctly: I always spoon my flour into the measuring cup and then level it off. Scooping directly can add too much flour, making your bars dry.
- Don’t Overbake: Trust me on this one! Overbaking is the enemy of a soft sugar cookie bar. Pull them out when the edges are just barely golden.
- Cool Completely: It’s tempting, but let the bars cool *fully* before frosting. Warm bars will melt your beautiful royal icing.
- Parchment Paper is a Must: I always line my pan with parchment. It makes lifting the whole slab out for cutting and frosting so much easier.
- Adjust Icing Consistency: The royal icing consistency is key. Add water a tiny bit at a time until it’s like runny peanut butter for dipping, and thicker for piping.
- Work Quickly with Icing: Royal icing sets fast! Keep your bowls covered with plastic wrap when not in use, and work efficiently when dipping.
Common Mistakes to Avoid
Overmixing the Dough:
Why it happens: Mixing the flour too much develops the gluten, leading to tough, chewy bars instead of soft ones.
How to fix it: As soon as the dry ingredients are just combined and no streaks of flour remain, stop mixing.
Overbaking the Bars:
Why it happens: Leaving the bars in the oven too long dries them out and makes them crispy, not soft.
How to fix it: Watch them closely! Remove from the oven as soon as the edges are barely golden and the center looks set.
Not Cooling Bars Completely:
Why it happens: Trying to frost warm bars will cause the royal icing to melt and run off, making a messy situation.
How to fix it: Be patient! Allow the bars to cool completely to room temperature on a wire rack before you even think about the frosting.
Incorrect Icing Consistency:
Why it happens: Too thick, and it won’t dip smoothly. Too thin, and it will run off the bars.
How to fix it: Add water one teaspoon at a time to thin. If it gets too thin, you can add a tiny bit more powdered sugar to thicken it up.
How to Store Christmas Sugar Cookie Bars
- Room Temperature: Store leftover cookie bars in an airtight container at room temperature for 3-4 days.
- Freezing Unfrosted: The unfrosted cookie bars can be frozen and defrosted before decorating.
- Freezing Frosted: Frosted cookies should not be frozen, as the icing can get sticky or weep upon thawing.
Frequently Asked Questions
Can I use regular butter instead of unsalted?
Yes, you can! If you use salted butter, just reduce the added fine sea salt in the dough by about a quarter of a teaspoon.
Do I have to use meringue powder for the royal icing?
Meringue powder is highly recommended for royal icing. It helps the icing set firm, shiny, and stable, and is crucial for that classic royal icing texture.
How do I know when the cookie bars are fully baked?
Look for the edges to be just lightly golden brown and the center of the bars to appear set and not jiggly when you gently shake the pan.
Can I make these bars ahead of time?
Absolutely! You can bake the cookie bars a day or two in advance, let them cool, and store them unfrosted in an airtight container. Frost them closer to when you plan to serve.
What if my royal icing is too thick or too thin?
If it’s too thick, add water a tiny bit at a time (1 teaspoon) until it reaches the desired consistency. If it’s too thin, you can stir in a small amount of extra powdered sugar until it thickens up.
I really hope these Christmas Sugar Cookie Bars bring a little extra cheer to your holiday season! They’re simple, delicious, and so much fun to decorate. Give them a try, and let me know how they turn out – I’d love to hear about your festive creations!
PrintChristmas Sugar Cookie Bars

Soft, chewy sugar cookie bars topped with vibrant royal icing and festive sprinkles, perfect for holiday gatherings.
- Prep Time: 30
- Cook Time: 25
- Total Time: 155
- Yield: 24 bars
- Category: Dessert
- Method: Baking
- Cuisine: American
- Diet: Vegetarian
Ingredients
- 1 cup unsalted butter melted
- 1 1/2 cup granulated sugar
- 2 large eggs room temperature
- 1 tbsp vanilla extract
- 3 1/4 cups all-purpose flour
- 2 tsp cornstarch
- 1 tsp fine sea salt
- 2 1/2 cups powdered sugar
- 1 tbsp + 1 tsp meringue powder
- 3-5 tbsp water
- 1/4 tsp clear vanilla extract
- Christmas colored sprinkles
- Red and green gel food coloring
Instructions
- Line a metal 9×13 baking pan with parchment paper.
- Preheat the oven to 350 F (180 C).
- In a large bowl, whisk together the melted butter and granulated sugar until well combined.
- Whisk in the eggs and 1 tbsp vanilla extract until combined.
- Fold in the flour, cornstarch, and salt until just combined.
- Press the sugar cookie dough into the prepared pan, using lightly greased hands.
- Use an offset spatula to smooth the top and evenly spread the dough to fill the pan.
- Bake in the preheated oven for 18-25 minutes.
- Check for doneness when the cookie dough is set and the edges near the pan are barely golden brown.
- Let the pan cool completely on a wire cooling rack.
- Once cool, flip the cookie bars onto a cutting board so the bottom is now the top.
- Cut the bars into rectangles, squares, or triangles.
- Transfer the cut bars to a wire rack with a sheet pan underneath.
- Distribute the bars amongst 2 pans to prevent crowding.
- To make the royal icing, combine the powdered sugar, meringue powder, 3-5 tbsp water, and 1/4 tsp clear vanilla extract in a stand mixing bowl.
- Whisk on medium speed for 3 minutes until the icing is fluffy.
- Set aside a few tablespoons of the thick icing for piping, if desired.
- If the icing is too thick for piping, add 1 teaspoon of water at a time until it's thick but pipeable.
- Split the rest of the icing into thirds, scooping each portion into its own bowl.
- Immediately cover the top of each bowl with plastic wrap.
- Working with one bowl at a time, add about 2-3 teaspoons of water to the icing.
- Use a spoon to mix the water into the icing until it has a consistency of runny peanut butter.
- Add red gel food coloring to one bowl of thinned icing.
- Add green gel food coloring to another bowl of thinned icing.
- Leave the last bowl of thinned icing white.
- Dip the flat side of each cut bar into the thinned icing.
- Use your finger to gently scrape off any excess glaze from the bar.
- Place the frosted bar back onto the wire rack.
- Decorate with Christmas colored sprinkles immediately after frosting.
- If using the thick icing, color it or keep it white.
- Fill the thick icing into a piping bag with a very small round tip.
- Use the piping bag to pipe designs on the frosted tops of the bars.
- Allow the cookies to fully set before boxing or packaging them, which can take about 1-2 hours depending on humidity.
Notes
Measure flour by spooning it into the measuring cup and leveling off for accuracy.
Do not overbake the bars; they should be soft, not crispy.
Ensure bars are completely cool before frosting to prevent melting.
Royal icing sets quickly, so keep unused portions covered with plastic wrap.