There’s something so wonderfully nostalgic about homemade caramels. For me, it takes me right back to my grandma’s kitchen during the holidays. The air would just fill with that sweet, buttery scent, and you knew something magical was happening on the stove. These Soft, Buttery Homemade Caramels are just like that – pure comfort, melt-in-your-mouth goodness, and surprisingly simple to make.
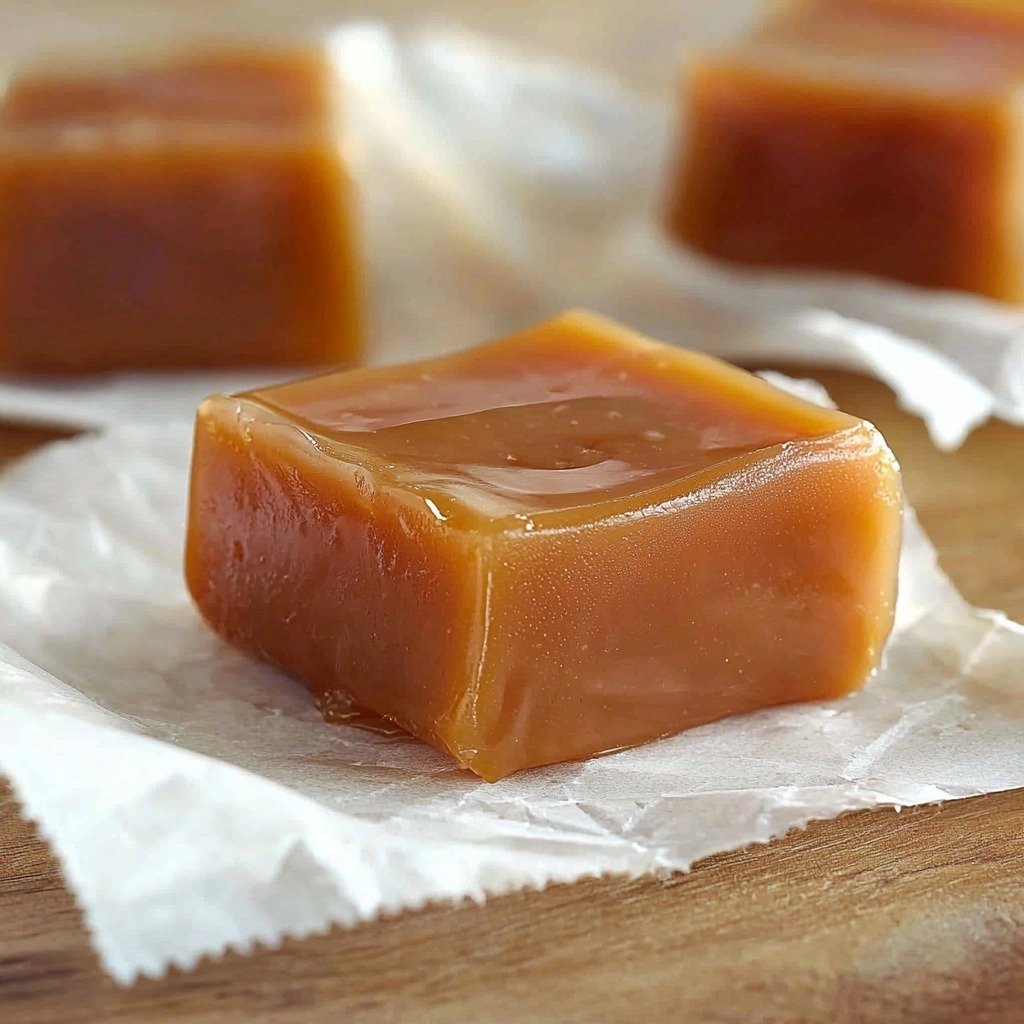
Why You’ll Love This Soft, Buttery Homemade Caramels
- They are incredibly soft and chewy, never hard or sticky.
- The flavor is pure, rich butterscotch, far better than store-bought.
- You only need a few basic ingredients you probably already have.
- Making them feels like a fun science experiment, and the results are so rewarding!
Ingredients You’ll Need
- Granulated Sugar: This is our main sweetener and provides the structure. Don’t swap it out for brown sugar here, as it changes the texture.
- Butter: Use unsalted butter for the best flavor control. It adds that essential richness and helps with the smooth texture.
- White Corn Syrup: This is a key ingredient! It prevents sugar crystallization, which is what keeps your caramels beautifully smooth and soft, not grainy. There’s no good substitute for corn syrup in this recipe.
- Kosher Salt: A little salt balances the sweetness and really brings out all those caramel flavors. Don’t skip it!
- Evaporated Milk: This is different from condensed milk! Evaporated milk is unsweetened and has been cooked down to remove some water, giving your caramels a creamy, rich body.
How to Make Soft, Buttery Homemade Caramels Step by Step
First things first, get your pan ready! Line a 9×13 inch pan with parchment paper. This is super important because it makes removing and cutting your caramels so much easier later on. Set that aside so it’s ready when your caramel is.
Now, grab a large, heavy-bottomed pot. I find a good stainless steel one works best for even heating. You’re going to melt your sugar, butter, corn syrup, and salt together over medium heat. Stir it gently until everything is combined and the sugar starts to dissolve. Once it comes to a boil, it’s time for the evaporated milk. This is where you need to be patient and encouraging! Add the milk very slowly, a little at a time, taking about 10-15 minutes for each can. Stir constantly as you do this. It’s a labor of love, but it’s worth it for that perfect texture.
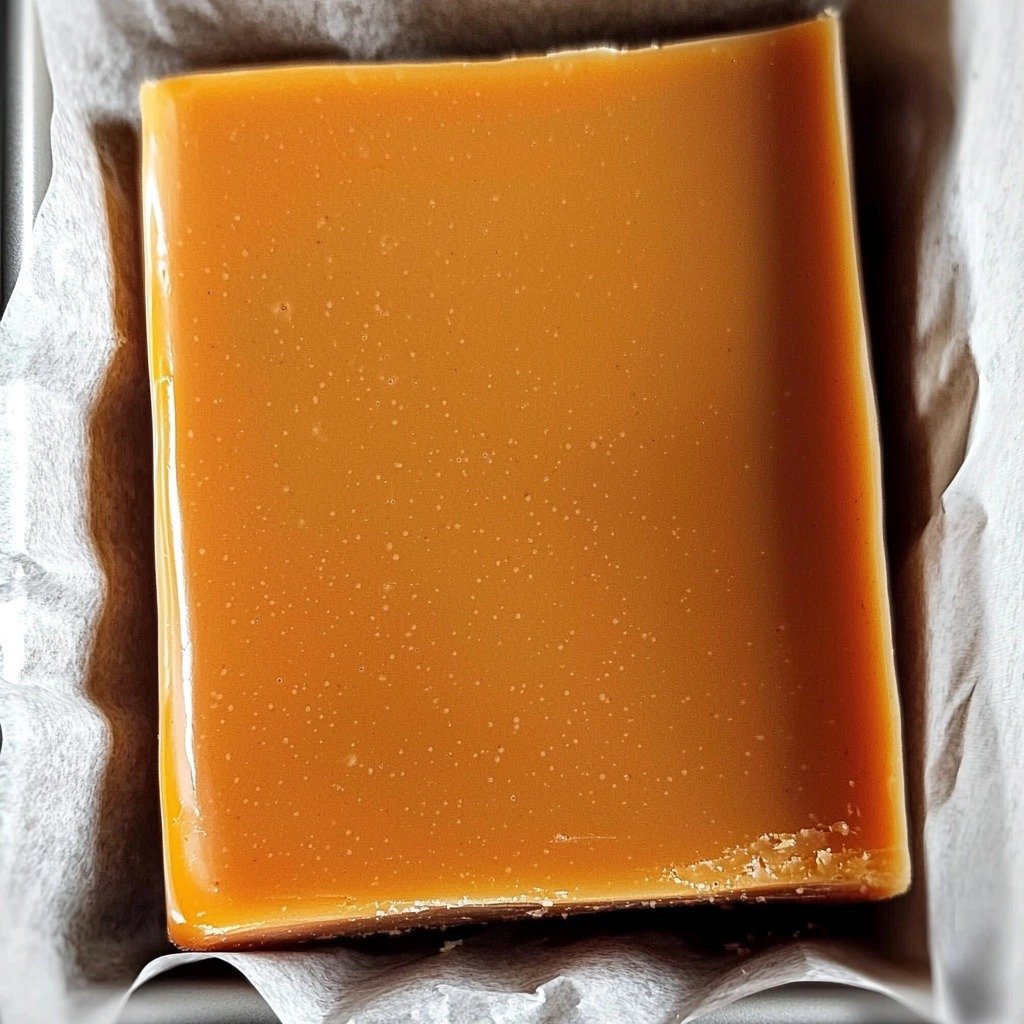
Once all the milk is in, keep stirring and bring the mixture to temperature. You’ll need a candy thermometer for this, and trust me, it’s your best friend here! You’re aiming for 238°F-240°F. Do NOT let it go hotter than 240°F, even a few degrees can make your caramels chewy instead of soft. This part will take another 15 minutes or so. I always double-check the temperature with an instant-read thermometer as it gets close, just to be sure. As soon as it hits that sweet spot, immediately pour it into your prepared pan. Let it cool completely at room temperature, then you can chill it for easier cutting!
My Top Tips for Success
- I always make sure my parchment paper hangs over the edges of the pan. This creates “handles” for lifting the cooled caramel out.
- In my experience, stirring constantly, especially when adding the milk, prevents scorching and ensures a smooth, even caramel.
- Trust me on this one: invest in a reliable candy thermometer. It’s the key to perfect caramel texture.
- Don’t rush the cooling process. Letting the caramel cool completely at room temperature before chilling helps it set properly.
- For super clean cuts, I like to freeze the caramels for 20-30 minutes before slicing. They aren’t frozen solid, but firm enough.
Common Mistakes to Avoid
- Not using a heavy-bottomed pot: A thin pot can cause the caramel to scorch on the bottom before the rest cooks, leading to a burnt taste.
- Adding evaporated milk too quickly: This can cause the temperature to drop drastically, making the cooking process much longer and affecting the final texture. Add it slowly!
- Overcooking the caramel: Going above 240°F will result in hard, overly chewy caramels. Keep a close eye on that thermometer!
- Not lining the pan properly: If your pan isn’t lined well with parchment paper, the caramels will stick, and it will be a messy nightmare to remove them.
- Stirring aggressively after the boil: Once it’s boiling and you’ve added the milk, gentle, continuous stirring is best. Too much aggressive stirring can introduce air and affect the texture.
How to Store Soft, Buttery Homemade Caramels
- Room Temperature: Up to 2 weeks in an airtight container, individually wrapped in wax paper.
- Refrigerator: Up to 3-4 weeks in an airtight container, individually wrapped.
- Freezer: Up to 3 months in an airtight, freezer-safe container, individually wrapped. Thaw at room temperature before enjoying.
Frequently Asked Questions
What makes these caramels soft?
The precise balance of ingredients, especially the corn syrup preventing crystallization and the careful cooking to 238-240°F, ensures a perfectly soft and chewy texture.
Can I make these without a candy thermometer?
While some experienced candy makers can eyeball it, a candy thermometer is highly recommended for consistent results, especially for beginners. It takes the guesswork out of achieving the correct temperature.
Why did my caramels turn out grainy?
Grainy caramels usually happen when sugar crystals form. This can be due to not using corn syrup, stirring too much at the wrong time, or sugar crystals clinging to the side of the pot.
Can I substitute other milks for evaporated milk?
No, evaporated milk is crucial for the rich flavor and creamy texture of these caramels. Regular milk or cream will not yield the same results due to their different fat and water content.
How do I cut the caramels cleanly?
Once cooled, chilling or briefly freezing the slab of caramel makes it much easier to cut into neat pieces. Use a sharp, lightly oiled knife for the best results.
I hope you give these Soft, Buttery Homemade Caramels a try! They’re such a delightful treat and truly bring so much warmth to the kitchen. If you make them, I’d absolutely love to hear how they turned out for you!
PrintSoft, Buttery Homemade Caramels
Indulge in incredibly soft, melt-in-your-mouth homemade caramels with a rich, buttery flavor that’s surprisingly easy to achieve.
- Prep Time: 15
- Cook Time: 45
- Total Time: 300
- Yield: approx. 60-70 caramels
- Category: Dessert
- Method: Stovetop
- Cuisine: American
Ingredients
- 4 cups (800g) granulated sugar
- 2 sticks (226g) butter
- 2 cups (480ml) white corn syrup
- 1 teaspoon kosher salt
- 2 12 oz. cans (708ml) evaporated milk
Instructions
- Line a 9×13 inch pan with parchment paper. Ensure the parchment paper hangs over the edges to create 'handles'. Set the prepared pan aside.
- Melt the granulated sugar, butter, white corn syrup, and kosher salt together in a large, heavy-bottomed pot over medium heat.
- Stir the mixture gently until all ingredients are combined and the sugar begins to dissolve.
- Once the mixture comes to a boil, begin adding the evaporated milk.
- Pour in the evaporated milk very slowly, a little at a time, taking approximately 10-15 minutes per can.
- Stir the mixture constantly during the entire process of adding the evaporated milk.
- After all the milk is added, insert a candy thermometer into the mixture.
- Continue to stir and cook the mixture until the candy thermometer registers between 238°F and 240°F.
- Monitor the temperature carefully; do not allow it to exceed 240°F.
- Immediately remove the pot from the heat once the desired temperature is reached.
- Carefully pour the hot caramel mixture into the prepared 9×13 inch pan.
- Allow the caramel to cool completely at room temperature.
- Once completely cool, transfer the pan to the freezer for 20-30 minutes, or refrigerate for a few hours, until firm but not frozen solid.
- Use the parchment paper handles to lift the caramel slab out of the pan.
- Cut the caramel into desired small pieces using a sharp, lightly oiled knife.
- Serve and enjoy your homemade caramels.
Notes
Use a heavy-bottomed pot to prevent scorching.
Add the evaporated milk very slowly to maintain temperature stability.
A reliable candy thermometer is crucial for perfect texture.
Chill the cooled caramel briefly before cutting for cleaner slices.